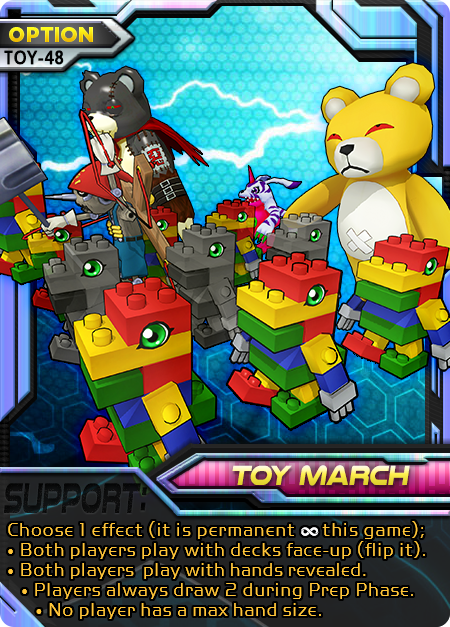
Toy March—They just keep going…and going…and going…
What’s good about it: You pick one of any 4 effects that stay permanently for the game. The flip effect means no need for [card img=”https://www.v-mundi.com/wp-content/uploads/2017/08/017-Gazimon.png” name=”Gazimon”]. This benefits the need to know what card comes next (for either player), for use with cards that lock powerful effects behind that knowledge, plus your own ability to have an extra card for support, and never be surprised by a cornered opponent who uses a top-deck support. The hand reveal effect means no need to attach [card img=”https://www.v-mundi.com/wp-content/uploads/2016/08/014-Research.png” name=”Research”]. Opponents who keep large hands will have a hard time surprising, and changes the strategy phase to remove risk. The draw 2 effect relieves the burden of needing [card img=”https://www.v-mundi.com/wp-content/uploads/2016/08/017-Purity-Crest.png” name=”Purity Crest”] attach or similar. This keeps a medium or high hand staying high all game. The max hand limit remover means not needing to evolve to [card img=”https://www.v-mundi.com/wp-content/uploads/2016/08/096-Jijimon.png” name=”Jijimon”], [card img=”https://www.v-mundi.com/wp-content/uploads/2016/08/095-Ebemon.png” name=”Ebemon”] rapidly. High-hand or conservative decks can continue to accrue better possibilities without hitting a wall. What’s bad about it: Everything that’s good about it but in reverse, since it’s applied to the opponent too. It’s slow to act, so you have to give up an entire support to begin your fun-house nonsense, while the opponent gets to reap your hard work for no cost. With this being a king-of-the-hill game sometimes, that can just mean getting pushed off the hill. Worse, you could choose an effect that unknowingly bolsters the opponent as much or more than you. Everything you wanted can unravel with a single well-timed [card img=”https://www.v-mundi.com/wp-content/uploads/2020/11/047-Clearwall.png” name=”Clear Wall”]—anything that voids . It’s no poptart—on its own you don’t get a lot from the card; it asks a lot of you to play within its boundaries. If you want one of the effects early, you have to commit to more copies of Toy March to ensure that, which means getting more copies late and needing to have other effects you want or else dead card. Tips: This is not the card you play because you don’t know what you’re doing. This is the card you play because you’ve thought to yourself “if only I could play with both hands revealed…I really know how to exploit that even for my cards.”; or “People invest heavily in spending resources on evolution and support, so they recover often anyway, might as well give myself permanent draw 2 since I am more efficient with my cardplay”; or “There’s so many ways a random face-down support can ruin this deck, I can’t let that happen. In fact, I should exploit that given that I have the cards to do it.”; or “My deck has a draw exploitation loophole almost no one else uses, why shouldn’t I hold as much deck in my hand as possible?”; or “Ugh I am so tired of trying to keep attachments. I don’t care if my opponent can have the effects too, just throw toys at the problem until it’s fun.” In other words, one does not simply Toy March into Toy March.You don’t build a deck around it (or maybe you do, I dunno be creative) you look at your deck and see what it could exploit. If that’s Toy March, give it a try.If you like the flip effect, try it with lots of Corrupt in the deck. You’ll know the exactly optimal time to play those cards and when to pick the effect for [card img=”https://www.v-mundi.com/wp-content/uploads/2016/08/065-Chip-D.png” name=”Chip D”]. That doubly stacks with [card img=”https://www.v-mundi.com/wp-content/uploads/2020/11/029-Golemon.png” name=”Golemon”] for either extra trash or +100 Power per corrupt! This also works in reverse—recode heavily benefits you if you know the next card sucks. If the top card of the opponent’s deck is a really good Digimon support, feel free to use Jamming right now since they’re probably thinking “hmm…free card and all upside!” Ever notice [card img=”https://www.v-mundi.com/wp-content/uploads/2016/08/195-Cherrymons-Mist.png” name=”Cherrymon’s Mist”] says “from the deck” not “facedown”? Perfect chance to void the top-deck support, since no one can resist getting the perfect one. Or howabout the fact that and blind-supports are heavily punishing? If you know they’re coming, you can decide whether the condition makes sense. Heck, your opponent knows that too, it might change what they want to do even if you don’t use the card. Just by having that card revealed, it’s essentially in your hand for support if you want that, which actually doesn’t just negate the risk of those types supporting from the deck; it lowers it due to your effective hand being higher and thus having more opportunities. Even more crazy, this is like a slow version of the hand-reveal effect since over time, you know every card the opponent draws. You could use [card img=”https://www.v-mundi.com/wp-content/uploads/2016/08/021-Chuumon.png” name=”Chuumon”] support to change your hand so it’s unknown periodically while you asymmetrically exploit the opponent’s hand. This is also a great effect for your ability to void accurately in general. If I don’t mention how utterly gross this effect is with [card img=”https://www.v-mundi.com/wp-content/uploads/2016/08/070-Lucky-Banquet.png” name=”Lucky Banquet”] I’m pretty sure someone will come to my house and yell at me. So there, consider yourself informed.
Like the hand-reveal effect? Opponents who draw a lot are going to play right into this one. They have more possibilities for responding to things, but you can easily work out what their best response is to the situation. Spending your resources quickly such as with Any Phase effects (and Turbo) can give you a significant advantage since you’re getting effects while giving up less information. This is a great effect in general for decks that can spend a lot on evolution. Those are usually the type that want to rack, use an evolve card, and still evolve to a future every chance they get. That low-hand, high-effect balancing act means evolve cards need to be in your favor, so try some utility evolutions like [card img=”https://www.v-mundi.com/wp-content/uploads/2017/08/023-Meatvolution.png” name=”Meatvolution”], [card img=”https://www.v-mundi.com/wp-content/uploads/2017/08/006-Splice-Chip.png” name=”Splice Chip”], and [card img=”https://www.v-mundi.com/wp-content/uploads/2017/08/024-Incubator.png” name=”Incubator”]. Evolutions happen before strategy or battle, so there’s no burden of the opponent spying, plus once you get those particular utility effects, they’re on the field and not much can really be done about it. That value will just sit there and work for you. But importantly, not the opponent. This is another good effect for void but most specifically Jamming. Figuring out when to use a Jamming attack is tough if the opponent’s hand isn’t known to you. But the fun part is if you know they have several Digimon supports, they know you know, and they know you have Jamming…that can change what they want to do and you may have Jamming affect the game without ever being used. Try using [card img=”https://www.v-mundi.com/wp-content/uploads/2018/05/030-Spinomon.png” name=”Spinomon”] to change your hand regularly with less costly mulligans or [card img=”https://www.v-mundi.com/wp-content/uploads/2018/05/043-Goddramon.png” name=”Goddramon”] evo-bonus to prevent the opponent doing the same.
The draw effect seems kinda cool right? You could really exploit an opponent that plays recklessly like the above evolution-spammer, since they’re going to draw 2 most of the time anyway. If you’re a more conservative player, you may not and that’s where you want to pick “always draw 2″. Even better, it creates a net differential for your deck quality using the infamous [card img=”https://www.v-mundi.com/wp-content/uploads/2016/08/054-Kokatorimon.png” name=”Kokatorimon”] exploit. Each time it sees you draw (up to two separate instances/turn), you can recycle any 1. If you draw more cards than you put back, your hand gets big and your deck gets small but mighty. Since you’d select awesome stuff to put in like your ACE or good late-game cards like [card img=”https://www.v-mundi.com/wp-content/uploads/2016/08/068-Silver-Ball.png” name=”Silver Ball”], your deck will get high-quality quickly while maintaining a high hand, which can easily do. If you end up with a surplus of cards, have a plan to dump them for extra value such as using Any Phase (or Turbo) effects and effects that discard as cost. You’re effectively getting them for free versus a game where you didn’t play Toy March. Those Any Phase could be powerful cards like [card img=”https://www.v-mundi.com/wp-content/uploads/2016/08/194-Digidiamond.png” name=”Digi-Diamond”], Miracle Ruby, [card img=”https://www.v-mundi.com/wp-content/uploads/2020/11/002-ToyCars.png” name=”Toy Cars”], [card img=”https://www.v-mundi.com/wp-content/uploads/2020/11/046-DirtySaucer.png” name=”Dirty Saucer”], [card img=”https://www.v-mundi.com/wp-content/uploads/2016/08/003-Datamorph.png” name=”Data Morph”], or Research. If you use very few cards to evolve but still get KO’d, you can recover as well as someone who pumps virtually their whole hand into it. You can also exploit cards like [card img=”https://www.v-mundi.com/wp-content/uploads/2016/08/197-Training-Manual.png” name=”Training Manual”] or [card img=”https://www.v-mundi.com/wp-content/uploads/2016/08/131-Asuramon.png” name=”Asuramon”] evo-box to max your hand quickly yet still keep drawing 2. Plus you can use the high draw your opponent gets to your advantage by selecting the best card to discard with [card img=”https://www.v-mundi.com/wp-content/uploads/2020/11/045-Poopbazooka.png” name=”Poop Bazooka”], which is way better if they’re peeling through the deck quickly. After all, it’s easier to discard an ACE if they actually draw it. That also acts as a soft counter for TOY [card img=”https://www.v-mundi.com/wp-content/uploads/2020/11/040-Psychemon.png” name=”Psychemon”] and [card img=”https://www.v-mundi.com/wp-content/uploads/2016/08/077-Mushamon.png” name=”Mushamon”], if low-hand decks are giving you trouble. Deliberately increasing the opponent’s hand is not a bad move every time! Another example is [card img=”https://www.v-mundi.com/wp-content/uploads/2020/11/020-Fakedrimogemon.png” name=”Fakedrimogemon”]. It doesn’t matter how large their hand was before the discard, it will only be 3 afterward. 3 very corrupted and cursed cards. That adds to the already fast rate their deck will be ticking down, card by card, fueling trash-heavy strategies. That Fakedrimogemon with this effect alone is worth at least 5 cards out of the deck for that turn, but you get something even more sinister than the equivalent [card img=”https://www.v-mundi.com/wp-content/uploads/2016/08/190-DigiGrave.png” name=”Digi-Grave”].
Hand limits not your thing? Most people probably don’t run into this. Most people probably don’t exploit the hell out of weird combos. The Training Manual mentioned earlier works just as well here plus [card img=”https://www.v-mundi.com/wp-content/uploads/2016/08/004-Gold-Mushroom.png” name=”Gold Mushroom”]. As does any other card that “draws until hand is X” since you can count on it being a reliable base to build your numerical superiority from. A well-timed [card img=”https://www.v-mundi.com/wp-content/uploads/2016/08/087-Wizardmon.png” name=”Wizardmon”] can fill your trash for use later with trash-powered effects while still building your infinite hand base number starting at 4. Imagine the constant pressure from [card img=”https://www.v-mundi.com/wp-content/uploads/2016/08/023-Friendship-Crest.png” name=”Friendship Crest”] for your opponent to support every single turn (which you can copy) under the threat of letting your hand get significantly larger. Every. Turn. The implication here is that you can always count on meeting “If own hand is larger” conditions which are on supports and DP increases alike. All of those evo-bonuses that have a whopping draw 3 like [card img=”https://www.v-mundi.com/wp-content/uploads/2020/11/008-MetalMamemon.png” name=”Metalmamemon 08″] are incredibly valuable for this sort of plan. Same goes for huge-draw supports like [card img=”https://www.v-mundi.com/wp-content/uploads/2016/08/042-Hawkmon.png” name=”Hawkmon”], [card img=”https://www.v-mundi.com/wp-content/uploads/2018/05/006-Snowgremon.png” name=”Hyogamon”] or a risky [card img=”https://www.v-mundi.com/wp-content/uploads/2020/10/012-Soulmon.png” name=”Soulmon”] once you have your “draw until” base formed. Even better, there are several Any Phase draws you can exploit like the Digi-Diamond and Toy Cars from before, plus [card img=”https://www.v-mundi.com/wp-content/uploads/2017/08/001-MetalgarurumonDATA.png” name=”Metalgarurumon DATA”] and [card img=”https://www.v-mundi.com/wp-content/uploads/2018/05/002-PhoenixmonDATA.png” name=”Phoenixmon DATA”]. “Take X in DP” evo-bonuses like [card img=”https://www.v-mundi.com/wp-content/uploads/2020/11/006-Pinocchimon.png” name=”Pinnochimon”], [card img=”https://www.v-mundi.com/wp-content/uploads/2016/08/084-Cherrymon.png” name=”Cherrymon”], [card img=”https://www.v-mundi.com/wp-content/uploads/2020/11/032-Weedmon.png” name=”Weedmon”] and Plug-In Backup will no longer flood your hand with things you have to use or lose immediately and run the risk of a hand overflow. You could exploit a [card img=”https://www.v-mundi.com/wp-content/uploads/2018/05/021-Metalpiranimon.png” name=”Metalpiranimon”] loop, where you evolve to it with the bonus, give it your all, die and draw 2, then loop that or revive it for more chances at draw 2 (at the cost of KO, but it’s Level M so you’re getting KOs too). In fact, you can really abuse evo-bonuses with draw 3 if you get extra activate an evo-bonus, such as [card img=”https://www.v-mundi.com/wp-content/uploads/2018/05/05-Moxie.png” name=”Moxie”], [card img=”https://www.v-mundi.com/wp-content/uploads/2016/08/022-Love-Crest.png” name=”Love Crest”], and pile more on top with [card img=”https://www.v-mundi.com/wp-content/uploads/2016/08/166-D-Link.png” name=”D-Link”]—potentially draw 9 if the stars align, which they might since you’re using a heavy amount of draw elsewhere which fuels more draw. Plus you can often get extra draw from attack abilities continually, plus any attachments…the list goes on seemingly forever. Getting those larger hands consistently means being far more resistant to the awful effects of “discard at random” from effects like [card img=”https://www.v-mundi.com/wp-content/uploads/2016/08/185-ScummonCurse.png” name=”Scummon’s Curse”] or your own costs. While [card img=”https://www.v-mundi.com/wp-content/uploads/2018/05/065-MetalParts.png” name=”Metal Parts”] is probably an overblown way to cash out such a large hand, there are plenty of effects that scale with hand size without creating a loss in hand, like [card img=”https://www.v-mundi.com/wp-content/uploads/2016/08/136-WhamonU.png” name=”Whamon”] U support or the activate of [card img=”https://www.v-mundi.com/wp-content/uploads/2016/08/145-Wargreymon.png” name=”Wargreymon”]. Or just dump the hand with [card img=”https://www.v-mundi.com/wp-content/uploads/2016/08/090-Rusttyrannomon.png” name=”Rusttyrannomon”]. If you’re worried about being completely wrecked by some horrifying Fakedrimogemon or [card img=”https://www.v-mundi.com/wp-content/uploads/2016/08/148-Rosemon.png” name=”Rosemon”] effects, you can always protect your hand from discard with PR [card img=”https://www.v-mundi.com/wp-content/uploads/2017/08/001-Herculeskabuterimon.png” name=”Herculeskabuterimon”], [card img=”https://www.v-mundi.com/wp-content/uploads/2016/08/089-Grankuwagamon.png” name=”Grankuwagamon”], [card img=”https://www.v-mundi.com/wp-content/uploads/2017/08/049-Omegamon.png” name=”Omegamon”] or BR [card img=”https://www.v-mundi.com/wp-content/uploads/2016/08/147-Herculeskabuterimon.png” name=”Herculeskabuterimon”].
Just a thought but if you think it’s hard to get a huge hand with little effort and groaned a the long list of combos, I have an easier one for you. Just our little secret between us. Any Phase or Turbo timing with Draw, plus the same timing with Recycle (no shuffle). Try to find one. There are hints everywhere. If you think that would be hard to get as an in-hand combo after Toy March is played, try checking their card types and see if anything can search for them.
Overall, Toy March may not work as well on its own without backup, but there are so many combos that I had to arbitrarily set a cutoff point for this article or it could take all week. It may not even be possible to enumerate every use without a longstanding podcast series to explore solely this one card. And the reason for that is what Toy March actually does: it lets you pick a new variant rule for DBE—a mutator if you will. It’s turning on all the items in Super Smash Bros. It’s a “choose your own Mastery card” too in many ways. Sure, it’s slow if you don’t give it turbo with Toy Cars or slip one in early game while things are still getting started, or wait until you’re in a little bit of a secure position to pop one down. And sure, it’s a potential minefield of backlash effects from what your opponent might be able to exploit. You absolutely have to watch out for Clear Wall, even though they still have to play and use up that card to stop yours. Out of all that, you still get a substitute for multiple different attachments all in one card, that uses no slots, that can’t be removed except for a tiny number of specific cards, and won’t be discarded when KO’d. That increases your security in keeping those effects. Maybe don’t start with Toy March in the deck at first. Try testing an existing deck and find out if some property can be fixed or amplified by the card. But ultimately you’re the one putting it in your deck. It asks that you have a plan for these things. In return, it grants you a completely different game.
Leave a comment