Epic Decklist

Epic: Zombie OTK

Requires Tyrants expansion.

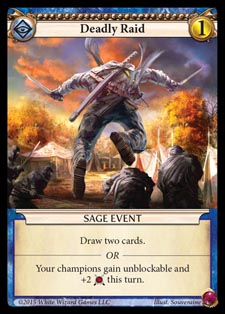
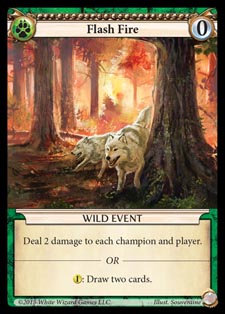
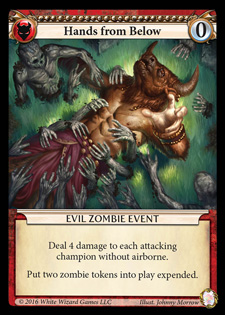
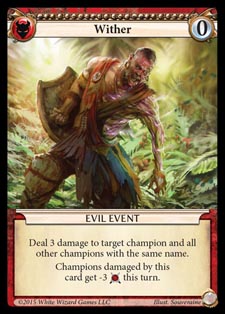
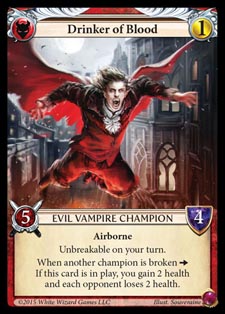
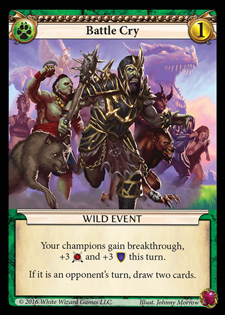
You cannot typically perform an OTK (one turn kill) in Epic, from full health. Dealing 30 damage in one turn, is very difficult; or even dealing very close to it like 25 after some health is lost. It can be done and usually relies on attacking while using some sort of sure-fire boost like Battle Cry or Deadly Raid on a massive token field. This deck shares only one real thing in common with that approach: tokens. In this deck, we are going to use pure burn to kill someone in as close to one turn as possible. How? First, we need to establish two engines: draw and zombie production. If you get a Drinker of Blood early in the game, the draw engine is less important. Here’s how it works: draw Drinker of Blood and some sort of board wipe, preferrably a silver-costed wipe so you can do this without giving the opponent two responses. A gold will have to wait until their turn, which is 2 responses (one on yours, one on theirs) so silvers like Hands From Below will not provoke a response. A 0-response solution would be Wither or Flash Fire. Due to the attacking rules that give attackers priority to play first, Spike Trap and Hands From Below operate without provoking any response.

Okay, now that you have your weenie board wipe and Drinker and your zombies are all out (including opponent zombies or both players having weak other champions depending on your possible out), now the magic begins. Nuke. Win. Drinker of Blood will make each opponent lose[es] two life and you gain two life for each champion that breaks at this time. If you’re responseless at the time, you auto-win.

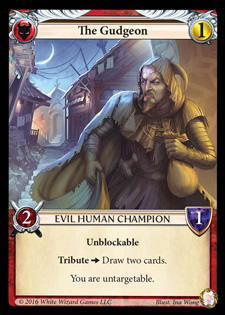
This means, it cannot be stopped by The Gudgeon because it does not target, is not useless in multiplayer since everyone loses the life, and cannot be punished even when it fails to force a loss of all the remaining life because you will gain all that ridiculous amount of life for yourself. So even if you fail to get all 30 or 28 or whatever the situation, even if you do 18-20, you’re getting that much and they’re losing that much. Such a gap usually leaves opponents unable to defeat you before you do something minor and win. Don’t forget that one of your outs is Flash Fire which will do 2 more damage on top of that. Special note here: even though some cards in this deck give zombies to the opponent, which is technically usable by our Drinker of Blood OTK gambit, the decklist notes will not count them as usable since you never know what an opponent will do with it once it’s theirs.

Here are a list of play flow tips that should help you:

  • If you don’t have Drinker of Blood, mulligan aggressively. 5 cards if no Drinker and no Flash Fire (best finisher). 4 if one of them. Mulligan 5 gives a 42% chance of opening a Drinker, with one being in the next 9 cards on average if you fail
  • Set up zombies slowly early on, so as not to provoke a board wipe
  • Do not attack with early zombies for the same reason (plus you don’t want them dying off)
  • You will have way more silver board wipe wincons than you know what to do with. Don’t be afraid to waste a few Hands From Below for extra tokens
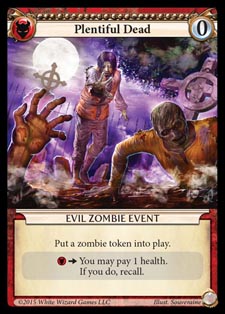
  • Make sure you always respond with Plentiful Dead before your intended response! You need multiple activations of this
  • Don’t pay attention to life costs as you will gain the life back, but don’t uselessly spam Plentiful Dead or you’ll die
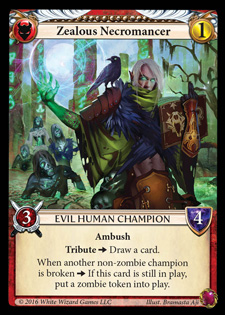
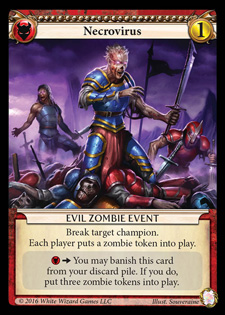
  • Make sure to use Necrovirus as early as possible to set up zombie “extensions” (where you get more than you visibly had available later)
  • Use The Gudgeon not just to draw a ton but to stop discard control from ruining your Plentiful Deads and Necrovirus

Legend for deck keypoints:

  • OPP – Counts as playable on the opponent’s turn. This is essential to keeping good rhythm and affecting game play every single turn. Doesn’t count re-usable.
  • DRW – Draws at least 2 cards, or is a draw engine. Required to keep playing cards every turn including on the opponent’s turn, especially if you’re board wiping.
  • TKN – Produces zombie tokens.
  • RMV – Any type of removal whether spot or board wipe, including weenie removal since our deck profits here.
  • MVP – Don’t squander these as they’re your best cards. (ACE for Events)

Zombie Counter: For tracking average zombies per card at the end.

Za Warudo
Silver 0: 18

3 Plentiful Dead – Constant source of free zombies you don’t realize will be incredibly necessary. Since you can play it before your gold, then play a gold, then do the same thing on your opponent’s turn, it’s easy to manufacture 4 per round per copy of this card. So this will count as +4 zombies. TKN

3 Wither – Second-easiest way to start the OTK in the deck and best of all, it still gets all zombies regardless of whose you target first. ACE RMV

3 Hands From Below – Used when your own zombies attack in a mass group to kill them all (or demons/wolves given by your opponent) while Drinker is on the field. Can alternatively be used to just get 2 extra zombies when needed if you have a different out. +2 Zombies. TKN RMV

3 Arcane Research – Used to fish very deeply for Drinker of Blood. Even if you fail, that can be around 5 cards deeper than you were. Totally invaluable for this deck and always at least replaces itself. Be careful of your greyboxes in the discard. Run Spike Trap instead if you have more trouble getting finishers (you probably won’t). Because of the intense amount of digging, it’s listed as DRW despite not giving a +1, please remember this! The DRW is for Drinker anyway. OPP DRW

3 Muse – Draw engine. Cheeky 2 damage in the air which can reduce the amount of zombies required to OTK by 1 each time (with some risk). DRW

3 Flash Fire – Primary and easiest way to perform the OTK in the deck. ACE OPP DRW RMV

Gold 1: 42

Removal: 12
3 Hurricane – Reminder do not play this on an opponent’s turn immediately after dropping Drinker. You won’t need to anyway but this is mostly to field clear weird stuff your opponent drops. OPP DRW RMV

3 Transform – Works really well for giving you yet another token to kill to Drinker as well as spot removal for anything that’s unbreakable or unbanishable (the former of which this deck is weak to). OPP DRW RMV

3 Zombie Apocalypse – A real horrorshow. +X Zombies. OPP DRW TKN RMV

3 Necrovirus – This spot removal puts 2 new zombies on the field and makes 3 more the moment you play an ally. Counts as +4 zombies total (1 goes to the opponent). OPP TKN RMV

Zombie Army: 9
3 Zealous Necromancer – Always good to have ambush draw, plus you can slow-roll a zombie army when your opponent’s stuff dies. +4 Zombies on average in testing. OPP DRW TKN

3 Reap or Sow – Always take the zombies. You should have plenty of board wipes otherwise. This is best used as OPP, especially if Necrovirus is in the discard, as that creates huge armies quickly. +4 Zombies. OPP TKN RMV

3 The Risen – Unlike a typical zombie deck or spammy evil token deck, it’s not used for swinging with some zombies. Mostly it’s used to build an army on OPP so you can surprise OTK on your turn. Use as needed however. +3 Zombies. OPP DRW TKN

Utility: 21

3 Drinker of Blood – Make sure this will either kill or permanently cripple an opponent when finally dropped. It’s too precious to squander. Look for creative and weird ways to extend your damage as hard as possible (Flash Fire, Muse, opponent’s weaklings, etc.) Draw until you get this as it’s required to win. Be clever and sneaky about what you’re doing, so you don’t provoke an enemy board wipe. I can usually get away with 4-6 zombie tokens completely right before I spend my gold on my opponent’s turn before I play Drinker, and yet still end up extending my zombie generation between that time period to an OTK. MVP

3 The Gudgeon – Precious discard protection. Precious draw. Ping every turn to reduce our zombie army requirements by 1 each time it attacks. DRW

3 Final Task – This is just for emergencies to bring back a dead Drinker. By that point late in the game, with all your draw engine, you’ll have one just fine (and it can swing in the air with unbreakable, which extends the damage that turn). Also used to grab draw engines. OPP DRW

3 Winter Fairy – Draw engine and strong Turn 1 play. OPP DRW

3 Thoughtplucker – Draw engine and hand control. OPP DRW

3 Crystal Golem – Minor draw, some needed OPP and fills the Sage slot better than anything else. OPP DRW

3 Battle Cry – (If lack of champions bothers you, run Triceratops, Jungle Queen, or Sea Hydra instead.) Used as an alternate out for your zombie army when you have to swing early. Almost always just used to defend and draw 2 on an opponent’s turn, though. Remember that with an all-breakthrough field you want to swing as a group for maximum damage and minimum responses. OPP DRW

muse
arcane-research
flash_fire
plentiful_dead
hands-from-below
wither
drinker_of_blood
zealous-necromancer
the-gudgeon
winter_fairy
thought_plucker
crystal_golem
hurricane
battle-cry
transform
reap-or-sow
necrovirus
zombie_apocalypse
final_task
the_risen

Key Point stats

Keypoint totals:

  • OPP – 42 total cards. 70% of the deck works well on the opponent’s turn.
  • TKN – 21 total cards. 35% of the deck is used to generate tokens for your finisher.
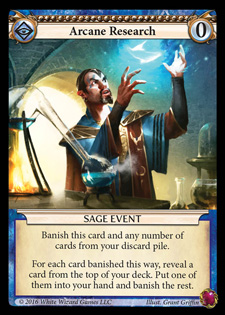
  • DRW – 42 total cards. 70% of the deck can give net hand advantage after it’s played. Arcane Research is for digging.
  • RMV – 24 total cards. 40% of the deck can be used as removal.

Intersection – 215% total, spillover (intersection) of 215%. Cards, on average have 2 of the deck’s key points on each card. Therefore each draw in this deck has a quality rating of 2.


Draw quality (+10). Reminder this is extra over the normal 100%.


Plus the above!

Please note that card quality does not mean anything objective. It’s a subjective self-measure of how well the deck does what it says it wants to. It measures synergy.

Zombie Counter: 18 total produced from unique cards

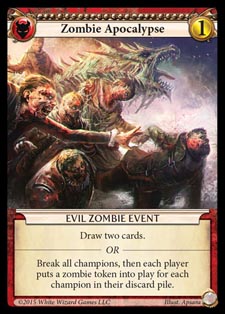
This means the average number of zombies per card is 18/20 or 0.9. That’s pretty intense. For every card you play, you get around 1 zombie. After 10 cards, you have 9 zombies on average. Though that would be assuming you were playing random cards from your hand with no goal in mind so really it ends up being far more. Essentially, a hand of 7 will have 6.3 zombies per card available to it. Adjust this on the fly to account for your particular game’s quirks, and for the value of Zombie Apocalypse in your game.

This deck is by far the strongest most consistent deck I have been able to make since I started playing Epic upon its release (over a year ago at the time of writing). That’s a very powerful statement given exactly how deep and complex Epic is as a game. Neverthless, its strong potential for non-respondable wins while working consistently and having multiple outs as well as defense makes this deck intensely hard to contend against. Even when using direct counters such as banish removal and discard control, the deck has protection and a plan. Once I come up with a weakness, I’ll be posting it here. This deck can win even when it gets a bad hand, though a bad start is always going to cripple you

It’s not even punishable. In the rare cases where the deck must go for OTK and cannot make it all the way, it’s gaining over 20 life and reducing the opponent that much too. Even in the upper teens of damage, you’re still making a gap that puts the opponent in critical condition and you way up in untouchable areas. If you think you’re not going to draw your win condition, you’re dead wrong. This deck is all gas and draw engines. Your biggest hiccup is against heavy life-gain decks but that was already covered in the part where you cripple the opponent with a less-than-full OTK. In the future, I hope to make the Wild gold choices stronger, but that will either require new insights or a new set release. I hope you all take this and stomp your local competition into the dust! Have fun.

By the way, the name comes from the stand of DIO from JoJo’s Bizarre Adventure, who is an all-powerful vampire that stops time to pummel you so you can’t respond. It seemed appropriate.

Top

Epic: Dragon Deck

Requires Tyrants expansion.

Often, most decks will try to combine alignments at least in part. For a Dragon deck, we must define exactly what we want the deck to do and let the colors flow organically into the deck from there. When considering what it means to have a “dragon” deck, first consider what they do well: Thundarus buffs them, they all have airborne, they are all big bodies. So the primary method of winning in this deck will be to get out Thundarus and go to town with powerful finisher effects. Getting Thundarus isn’t as easy as it sounds, so the deck will require a massive draw engine. This will have the side-effect of increasing our hand quality immensely and making us able to use any dragon effect we need in a given situation.

One of the major ways to win is going to be over-extending a successful hit with Mighty Blow or Rage. This will make the strong air the deck has stand out even more and push further than an opponent expected. Setting up one of several draw engines will be the deck’s early game goal, along with fielding some preliminary dragons to get in a few bites of damage while forcing their spot-removal out. Thundarus is one of the hardest to remove cards natively in the game since it’s so huge and unbanishable. It basically requires pure break, so a well-timed Mighty Blow is going to foil any attempts at removal short of bounce. Since every dragon is pure threat, you can easily whittle down an opponent’s spot-removal ahead of time, and since many of them are also flashes, you will likely get quality out of every dragon that died.

Legend for deck keypoints:

  • OPP – Counts as playable on the opponent’s turn. This is essential to keeping good rhythm and affecting game play every single turn. Doesn’t count re-usable.
  • DRW – Draws at least 2 cards, or is a draw engine. Required to keep playing cards every turn including on the opponent’s turn, especially if you’re board wiping.
  • AIR – Can actually do some damage in the air. Primary win strategy.
  • RMV – Removal, whether spot or board wipe.
  • MVP – Don’t squander these as they’re your best cards. (ACE for Events)
サーンダルスが倒せない (I cannot defeat Thundarus)
Silver 0: 9

3 Muse – Draw engine. DRW

3 Keeper of Secrets – Draw engine. Discard control. Use best with Ancient Chant in discard. DRW

3 Rage – Protect dragons from Hurricane, use to extend damage for the turn, get over bigger air, use to draw. OPP DRW

Gold 1: 51

Removal: 12
3 Hurricane – Hurricane is a risky board wipe but sadly necessary to keep up the Wild loyalty and you need an OPP board wipe. The good news is many dragons can be saved with Rage, and Thundarus won’t die from it. OPP DRW RMV

3 Transform – Best spot-removal in the game bar-none. Banishes the unbanishable, ignored unbreakable, only gives the controller a wolf, has draw 2 just in case. You’re all-air so wolves mean nothing. OPP DRW RMV

3 Lying in Wait – Just being used as an extra Transform. OPP DRW RMV

3 Stand Alone – Typically your best stuff is better. OPP DRW RMV

Dragons: 21
3 Thundarus – Your target. Always draw engine until you get the Dragon Lord of the North. After that, you can pump dragons at your leisure and it’s very hard to remove. MVP AIR

3 Gold Dragon – Gives itself and Thundarus Righteous, which should really provoke a scoop if an opponent can’t board wipe. The blitz and high defense make it excellent for instant pressure. AIR

3 Draka, Dragon Tyrant – THE strongest blitz air in the game as of Tyrants, even beating out a fully loaded Djinn of the Sands. Better still, on the attack it deals 3 damage to everything, wiping the board of smaller stuff, chump air blockers, and forcing any block in the air to generally favor Draka outside of Thundarus. AIR

3 Strafing Dragon – Gives the highest speed of any dragon in the game, and of most airs in the game. Also has a nasty burn built in, allowing it to block anything up to 11 and still kill, plus when it enters into an empty air field, that’s an instant 11 damage to the face. OPP AIR RMV

3 Draka’s Enforcer – Ambush draw for a body that can usually kill any air it blocks. Insane card advantage and turns into a mean attacker. OPP DRW AIR

3 Ice Drake – High defense and creates a mildly useful freeze effect (normally you can just use your air) but very important ambush blocking. OPP AIR

3 Blue Dragon – Important draw and ping engine. DRW AIR

Utility: 18

3 Mighty Blow – Such a ridiculous air attacker that can go in anything. Could technically be used on an opponent’s turn to protect something or surprise kill with a block but that is at the expense of a game-winning gambit, so doesn’t count as OPP but the draw does. Using on Thundarus makes it the most difficult to remove easiest damaging champion in the game, but using it on something Thundarus is boosting will split the opponent’s decision on what removal to use, thus increasing your chances of hitting. This is not to be played lightly and will often win games. ACE OPP DRW

3 Winter Fairy – Pure draw engine, but because of its effect, can swing wildly in the air not caring. DRW AIR

3 Thoughtplucker – Draw engine, hand control, and can be played on the opponent’s turn. What’s not to love? OPP DRW

3 Raging T-Rex – One of the best turn 1 plays and one heck of a draw. Putting this out there, like thoughtplucker, is so threatening that it ends up protecting your dragons in the long run. DRW

3 Surprise Attack – Make all those non-ambush dragons come in early. This is best used on Thundarus for the block, as you’ll get a kill and can then immediately begin your army of dragons on your turn. OPP

3 Army of the Apocalypse – Sit on it until you need to throw down some dragons. Because most won’t have blitz, I currently run Ancient Chant instead to act as an anti-discard (since it works after being discarded) and pseudo draw engine. Though Army gives another win condition. OPP DRW

keeper_of_secrets
muse
rage
strafing_dragon
draka-dragon-tyrant
drakas-enforcer
gold_dragon
thundarus
blue_dragon
ice_drake
transform
raging_t_rex
surprise_attack
stand_alone
thought_plucker
lying_in_wait
winter_fairy
mighty_blow
hurricane
army_of_the_apocalypse

Key Point stats

Keypoint totals:

  • OPP – 36 total cards. 60% of the deck works well on the opponent’s turn.
  • AIR – 24 total cards. 40% of the deck is used to attack or present a large body.
  • DRW – 42 total cards. 70% of the deck can give net hand advantage after it’s played.
  • RMV – 15 total cards. 25% of the deck can directly damage.

Intersection – 195% total, spillover (intersection) of 95%. Cards, on average have 1.9 of the deck’s key points on each card. Therefore each draw in this deck has a quality rating of 1.9.


Draw quality (+10). Reminder this is extra over the normal 100%.

Please note that card quality does not mean anything objective. It’s a subjective self-measure of how well the deck does what it says it wants to. It measures synergy.

Top

Epic: Wild Deck

If you haven’t checked out the base set Wild analysis, do that now!

Unlike some other alignments, Wild is actually capable of not only fitting in other decks but being pure by itself and still holding up. A pure Wild deck can in fact compete with a unique strategy that’s difficult to pull off with any other type. By sitting behind very large and threatening bodies, then lobbing burn damage directly to the opponent’s face, it can essentially create one of the safest win conditions. The general idea is there, though some of the specifics are slightly different. Packing cards like Lash or Rage helps to surprise damage someone who decided to throw a blocker under the bus.

The logic goes as follows: drop a threat, usually one which also doubles as a flash, then on the opponent’s turn, simply lob fireballs and lightning at them. The threat exists to draw removal from their hand, preventing the opponent from drawing 2 off an event (one of the worst things you can let an opponent do). This keeps the opponent’s hand size dwindling instead of increasing and frees up your gold to deal direct damage. You never really run out of threats so the moment they run out of removal, you’ve essentially got an easy game. Use any living or blitzing attackers with Lash and Rage to cause massive damage on the sly. Bonus points: use Mighty Blow after declaring Lash/Rage for +14 Unbreakable Breakthrough. This is usually a game ender and Mighty Blow is therefore an Ace.

If you’re drawing on schedule, you should be able to see 0.3 burn cards per card, which is 4 burns in about 13 cards. Thirteen cards are easy to draw (you start with 6 unless you went first, simply play two cards that draw 2 and wait three turns). Since the average burn damage in this deck is slightly under 6 damage per each (counting the permanents like Fire Shaman twice each), this means you’d only need 5 burns to win the game on average. If you can pull off a surprise Breakthrough, you might need anywhere from 3-4 burns to win. Herein lies why you only need to dig through 13 cards for 4 burns. Adjust that strategy within the game as you go based on how much total burn you can rack up after about your 8th card. You may have to rely more or less on your offense champions. Make sure you’re using primary drawing techniques like Raging T-Rex since he can go through 2 cards while also setting up a threat. The same goes for Triceratops to a different degree, as he has his “Lash/Rage” built in but at a lower draw amount.

Your basic weaknesses are freeze and airborne, with a lot of spot-removal. This means Wild has a really tough matchup against vanilla Sage. It can really suck when you plop down all these huge bodies and the opponent just ignores them with airborne. The good news is that unless they both have ground blockers and you don’t have the ability to get Breakthrough, you can still out-damage them if they try to race you. The bad news is that when they combine spot-removal with airborne, it’s very difficult for you to win out, especially if you’re coming up dry on burn. Not as common but a player that can block with a lot of champions to break yours while drawing a lot of cards can outpace you without any downside. That’s where you would need to use your surprise cards.

Legend for deck keypoints:

  • OPP – Counts as playable on the opponent’s turn. This is essential to keeping good rhythm and affecting game play every single turn. Doesn’t count re-usable.
  • DRW – Draws at least 2 cards, or is a draw engine. Required to keep playing cards every turn including on the opponent’s turn, especially if you’re board wiping.
  • OFF – Anything with a body above the Wild average of 9/9 OR above a 4/5 airborne. Counts for cards that can lend huge things breakthrough or huge power.
  • BRN – Fling directly at face.
  • MVP – Don’t squander these as they’re your best cards. (ACE for Events)
Power Overwhelming
Silver 0: 15

3 Fire Shaman – Constant source of 3 burn every turn. You will get 6 burn every round, meaning if an opponent doesn’t kill it Shaman wins games. BRN

3 Lash – Used to grant something breakthrough, and the +4 is nice too. Punishes weak blockers like crazy with effective face damage. Technically you can use the 1 damage to kill annoying champions like High King, Forcemage Apprentice, Necromancer Lord, or Thoughtplucker. Don’t forget you can get this back if you start running out of cards or options. That said, it doesn’t work well enough on OPP. OFF

3 Rage – Same as Lash but with the added bonus of draw. Doesn’t work as well on OPP. OFF DRW

3 Fireball – Easy extra damage. Usually you want to keep these in hand to slap down with something like Flame Strike for game so the opponent can’t predict when you have a win ready. This also frees it up to be used to board wipe weak tokens and utility champions. OPP BRN

3 Wurm Hatchling – Grows into a big breakthrough champion, usually requiring the expenditure of gold from an opponent. OFF

Gold 1: 45

Removal: 6
3 Hurricane – Most of your own stuff won’t get hit but beware your silvers and Hunting Raptors. Hurricane is often a mostly one-sided board wipe when timed correctly. OPP DRW

3 Transform – Best spot-removal in the game bar-none. Banishes the unbanishable, ignored unbreakable, only gives the controller a wolf, has draw 2 just in case. Ridiculous. OPP DRW

Offense: 30
3 Burrowing Wurm – Extreme levels of body on this one with the upside that all of it counts when it turns sideways. OFF

3 Rampaging Wurm – Used to put immediate pressure on the opponent and get surprise damage off from the breakthrough granting cards. OFF

3 Hunting Raptors – Burn card which, as with any burn, also works as removal. Try aiming it at faces as much as possible. Can easily do 4 damage per round as long as it doesn’t die. On the first round, it can get a nice 8 damage due to ambush. OPP BRN

3 Lurking Giant – Used purely as a big-body OPP to throw down and surprise-block for a kill. OPP OFF

3 Raging T-Rex – One of your most reliable sources of draw as it also leaves a threat behind. DRW OFF

3 Strafing Dragon – Easily your best champion. This often does 5 to face and then hits for 6 damage in the air, dealing way more than other champions. MVP OPP BRN OFF

3 Triceratops – Extremely threatening card that is hard to kill and gives a net+1 immediately when played. OFF DRW

3 Rain of Fire – Almost always used to burn directly for 5 and then hit other champions for 4 and 3, however there’s no shame in changing that up if you have to. Just remember you must have 3 different targets. OPP DRW BRN

3 Flame Strike – It burns. For 8. OPP BRN

3 Mighty Blow – Such a ridiculous air attacker that can go in anything. Could technically be used on an opponent’s turn to protect something or surprise kill with a block but that is at the expense of a game-winning gambit, so doesn’t count as OPP but the draw does. ACE OPP DRW OFF

Utility: 9

3 Jungle Queen – Her buff is practically tertiary, the main use for Queen is to ambush in things like Burrowing Wurm and to add OPP to all your champions. (Not OPP itself but makes everything else.) OPP DRW

3 Surprise Attack – Works exactly the same as Jungle Queen but faster. OPP

3 Army of the Apocalypse – Most of the time, your big bodies will die. Bring them back for a game-winning push with this. OPP DRW OFF

wurm_hatchling
rage
lash
fireball
fire_shaman
army_of_the_apocalypse
transform


raging_t_rex
strafing_dragon
burrowing_wurm
triceratops
surprise_attack
rampaging_wurm
rain_of_fire


jungle_queen
mighty_blow
lurking_giant
hurricane
hunting_raptors
flame_strike

Key Point stats

Keypoint totals:

  • OPP – 11 unique, 33 total cards. 55% of the deck works well on the opponent’s turn.
  • OFF – 11 unique, 33 total cards. 55% of the deck is used to attack or present a large body.
  • DRW – 9 unique, 27 total cards. 45% of the deck can give net hand advantage after it’s played.
  • BRN – 6 unique, 18 total cards. 30% of the deck can directly damage.

Intersection – 185% total, spillover (intersection) of 85%. Cards, on average have 1.8 of the deck’s key points on each card. Therefore each draw in this deck has a quality rating of 1.8.


Draw quality (+10). Reminder this is extra over the normal 100%.

Please note that card quality does not mean anything objective. It’s a subjective self-measure of how well the deck does what it says it wants to. It measures synergy.

As mono-color decks go, pure Wild works out quite well. Any given card is going to have a lot of quality to do what it needs to do. Complete with lots of poptarts, burn and offense, Wild is tough to beat. It takes a lot of airborne, removal and freeze. Though most alignments are also weak to the last two. It does suffer from a great lack of pure removal, relying only on its burn in dire situations, which is still often not enough. Despite that, the strategy of sitting behind big (card drawing or otherwise) threats while lobbing fire overhead is very “power overhwelming” indeed. The greatest strength of this deck is the not-so-apparent moments it can go for game. I find myself often being able to win while the opponent is at 11 or less just by having Fireball and Flame Strike in hand, neither to which an opponent can respond.

There’s this sort of life threshold the opponent approaches somewhere around 15 remaining to 8 remaining (a huge range) where they are in danger of immediately losing. This is especially powerful when combined with an opponent who takes a mulligan. Any opponent daring to mull 3 against this deck will find itself dying at 18 life to 11 life, usually without a way to stop it reliably. The most powerful combination you can try in this deck is Mighty Blow + Lash/Rage/Breakthrough + 10+ Power champion. Even if blocked, it can easily do around 15 damage. In combination with a blitzkrieg approach and lots of draw, while forcing the opponent to not draw, I have to say this deck is extremely difficult to deal with.

Top

Epic: Sage Deck

If you haven’t checked out the base set Sage analysis, do that now!

While decks are not required to stay “pure” colored, Sage does pretty well by itself just as a pure alignment. In fact, a pure Sage deck is pretty hard to mess up, since the cards to make a winning strategy are just so obvious. See, Sage can choose several of the winning strategies in Epic and not really lose out on anything. It can easily do freeze, simplify the game for opportunity swings, breakthrough (+blitz) on the ground, or burn, or airborne.

Please be aware that Sage does not have a lot of credible threats, which means your opponent gets to advance their field more, causing you to use more spot-removal and board-wipes. The deck accounts for this as best it can by including as many threats and removal cards as possible without sacrificing synergy but ultimately every deck will have at least one weakness otherwise it won’t do anything quite well.

The basic field you’ll be going for is huge pressure with stuff like Juggernaut or Steel Golem, which rarely hit directly but have their own benefits besides. While setting up air superiority with your Avenging Angel, Djinn of the Sands, or Blue Dragon. Make sure to never have more than 2 champions on the field until you go for game. Ping with burn damage and do a few small damaging gambits while drawing as hard as possible. You’re aiming to draw into one of the following 3 finishers: Frost Giant, Ice Drake, or Deadly Raid. At that point, rack up a field, hope they don’t take the 1-turn window to board wipe (bait one early if you can) and slap down your winning-move. If you fail, wait for a board wipe and start over and try again. You should see a finisher approximately every 7 cards, meaning your opening hand might even have one. This is important because if you fail, it’s just a short 8 cards from the opening hand to another one. This deck has so much draw that it’s easy to facilitate this gambit happening 3 times in one game. If not, you can likely just use gap-play just like Good.

Another weakness of this deck is the lack of silvers. Which can also be a strength since each card from hand is going to be worth more. However, Sage can draw pretty much as much as it wants and doesn’t care about losing a few silvers. The problem is that so few really fit with the deck that it makes it very difficult to squeeze them in. There also is enough multi-color room for Corpse Taker, so you do have that going for you, especially if it gets you back Frost Giant or Ice Drake and lets you go for game.

Legend for deck keypoints:

  • OPP – Counts as playable on the opponent’s turn. This is essential to keeping good rhythm and affecting game play every single turn. Doesn’t count re-usable.
  • DRW – Draws at least 2 cards, or is a draw engine. Required to keep playing cards every turn including on the opponent’s turn, especially if you’re board wiping.
  • OFF – In a bizarre twist of fate this includes anything the deck considers a main offensive play including freeze, burn, airborne, and so on. Getting any of these regardless of how you mix and match it will still be game-tilting.
  • CTL – Removal (Control). Spot-removal used to control threats on the field and filter the opponent’s best Champions away.
  • MVP – Don’t squander these as they’re your best cards.
Schrödinger's Wizard
Silver 0: 12

3 Forcemage Apprentice – A source of repeatable and easy burn which can sometimes be used to control smaller things. Great for dealing an easy 6 direct damage per round if not killed. OFF

3 Muse – Purely used to ambush in at the end of an opponent’s turn so you can start drawing more. OPP DRW

3 Amnesia – Mostly used for the draw 2 but is great to stop banishment costs for recycle as well as discard control since you use nothing from your opponent’s discard. This can hurt Evil and Wild really hard, or Good if they’re going for Angel of Mercy/Resurrection. OPP DRW

3 Corpse Taker (Evil) – Absolutely premium especially for getting back our freeze champions. Also controls the opponent’s discard like Amnesia.

Gold 1: 51

Removal: 21
3 Turn – Probably the best removal that works on your initiative in the game! Taking permanent control is way too excellent to pass up since that deprives the opponent of a gold and essentially gives you one in the process. Using it on the opponent’s turn is very unoptimal (though sometimes necessary) so it doesn’t get an OPP tag. CTL

3 Transform – Best spot-removal in the game bar-none. Banishes the unbanishable, ignored unbreakable, only gives the controller a wolf, has draw 2 just in case. Ridiculous. OPP DRW CTL

3 Wave of Transformation – Board-wipe that’s usable on the opponent’s turn. Creates a wolf-conomy (wolf economy) wherein players who know how to anticipate this board wipe can profit with more wolves. In this sage deck, we attack directly most of the time with burn, freeze, and airborne so we don’t care if the opponent gets wolves. OPP DRW

3 Zombie Apocalypse (Evil) – Same reason as Wave of Transformation. OPP DRW

3 Lying in Wait – Chosen for its status similarly to Transform, though it can only be used when you don’t have initiative. OPP DRW CTL

3 Time Bender – A great way to suddenly screw over an opponent who played a gold early on their turn, plus it’s re-usable! If it doesn’t die, Time Bender can cause serious problems for a player and works as a credible threat, drawing their removal cards away from key attackers. OPP CTL

3 Bitten (Evil) – Generic control but works best on the opponent’s turn with minimal downside. Most control will likely be played on the opponent’s turn. OPP DRW CTL

Offense: 27
3 Avenging Angel (Good) – Such a ridiculous air attacker that can go in anything. OFF

3 Djinn of the Sands – Another ridiculous air attacker that can go in anything, just with the potential to draw if you run out (you won’t ever) and much higher starting body. Doesn’t qualify for DRW tag. OFF

3 Deadly Raid – One of the game-ending gambit cards. MVP OPP DRW

3 Memory Spirit – Can deal decent airborne damage, net+1s an event from the discard (grab whatever you need, especially Deadly Raid), and has ambush. OFF OPP DRW

3 Frost Giant – One of the game-ending gambit cards. MVP OFF

3 Ice Drake – A game-ending gambit card with the added bonus of being set-up on the opponent’s turn so you can play something with blitz and add to your assault next turn. MVP OPP OFF

3 Juggernaut – Extremely threatening card that is hard to kill and gives a net+1 immediately when played. OFF DRW

3 Blue Dragon – Same as Juggernaut but even harder to stop from damaging plus a re-usable source of burn. Combos insanely with Forcemage Apprentice. OFF

3 Steel Golem – An optional blitzing threat that works well for immediate pressure and baiting board-wipes so you can use your big swingy turns more easily. OFF


forcemage_apprentice
amnesia
muse
corpse_taker
avenging_angel
time_bender
memory_spirit
blue_dragon
steel_golem
wave_of_transformation
turn
lying_in_wait
transform
juggernaut
djinn_of_the_sands
frost_giant
ice_drake
deadly_raid
bitten
zombie_apocalypse

Key Point stats

Keypoint totals:

  • OPP – 11 unique, 33 total cards. 55% of the deck works well on the opponent’s turn.
  • OFF – 9 unique, 27 total cards. 45% of the deck is used to deal damage.
  • DRW – 10 unique, 30 total cards. 50% of the deck can give net hand advantage after it’s played.
  • CTL – 5 unique, 15 total cards. 25% of the deck can filter the field and answer threats.

Intersection – 175% total, spillover (intersection) of 75%. Cards, on average have 1.7 of the deck’s key points on each card. Therefore each draw in this deck has a quality rating of 1.7.


Draw quality (+10). Reminder this is extra over the normal 100%.

Please note that card quality does not mean anything objective. It’s a subjective self-measure of how well the deck does what it says it wants to. It measures synergy.

Card Changes

Right now, there are only 6 cards (10% of the deck, or 1/10 draws) that can confound loyalty/ally.

  • Loyalty/Ally – 5 unique, 15 total cards. 25% of the deck requires at least two other Sages.
  • Removable – 2 unique, 6 total cards. 10% of the loyals can be removed if something better is used.
  • Confound – 4 unique, 12 total cards. 20% of the deck screws up 25% of the deck. Decently low screw rate but sometimes might need the 4 cards in hand to guarantee loyalty, however we have enough draw for it to be trivial.

Removable Cards:

  • Steel Golem. Removable if you can find better offense and control stacked into one. Just remember that this is a less killable Rampaging Wurm, so it’s pretty risky to remove but control might be favored in this spot as the deck has a lot of offense.
  • Time Bender. Basically the poor person’s High King/Dark Assassin but for Sage. Nevertheless, it does do its job, albeit at a less permanent value. Removable as long as more control replaces it.
  • Amnesia. It’s a pretty optional silver mostly here for the draw, banish control and a cool combo with Zombie Apocalypse. You can put anything that will fit here especially Keeper of Secrets. If you somehow get 6 more Evils, Thrasher Demon is something you can’t go wrong with as it usually draws gold advantage.
  • Lying in Wait. If you get rid of this, I highly suggest Stand Alone. This made it in since we usually go for draw or removal on the opponent’s turn anyway and try to play something like a threat or flash on our own turn. If you feel that there is a lack of board-wipes in your meta, go for Stand Alone as it will make keeping your progress easier and you can deal with whatever they have left usually.
Currently there are no replacement suggestions which is in large part due to the way the deck works. A base mono(ish) Sage deck is going to work essentially like this every time. There’s a permutation I didn’t go for that includes Sea Titan and Erase, which seeks to maximize as much gold advantage as possible. This one instead goes for the most consistent take on a swing-for-game win. There is a viable version that grind-games for as much gold advantage as possible that uses the aforementioned two cards as well as this deck’s Time Bender. Essentially baiting the opponent into playing champions and then punishing them while keeping its own advantage and field presence. It never hard-stops the opponent though and relies on hand removal (Psionic Attack, Thoughplucker) which this deck also cannot fit.

Enough about what the deck isn’t, here’s what it is: A crush-rushing aggro as hell Sage deck. I bet you didn’t see that one coming. We’re abusing the ridiculous library of offensive champions Sage has access to with the equally-stupid access to direct attacks and damage. While we’re at it, our hand will usually never go below 4, often staying around 6-7 in my experience. You can blindly play right into board wipes no problem as long as your champions are getting something extra when they come into play (flashes). You almost always have the right answer in any situation too. This deck seems to wreck the pants off of Good, go about even with my Evil and Wild decks. Whether that’s because I’ve built a good Sage deck or bad other decks I can’t really say but nevetheless this is your signature aggro Sage deck.

As discussed in the Sage alignment analysis, it can easily go toe-to toe with Good’s airborne, beats all other airborne, and beats the bodies of both Good and Evil. Its biggest problems are the lack of threat targets to stave off spot-removal of its attackers, lack of silvers for multi-play turns, and difficult time sometimes dealing with wide Token spam swings unless you run Lying in Wait and some more board-wipes.

Top

Epic: Evil Deck

If you haven’t checked out the base set Evil analysis, do that now!

Epic decks are not required to stay “pure” colored. So when you talk about having an “Evil” deck, what you must know is what it means to be Evil. Evil is all about messing with your opponent so that you can strike back. Weaken them, minimize their plays and use your own to make a stand. You must choose an offensive strategy in this game and there are only really a few: you can swing in the air, freeze, swing wide, simplify the game for opportunity swings, breakthrough (+blitz) on the ground, or burn.

Evil has a lot of options including burn (Soul Hunter and Blood Drinker), airborne (Succubus and Angel of Death), wide (Demon and Zombie token production), breakthrough (Trihorror), and control (myriad of kill cards). However, most of them would fail miserably as there are only 1-2 cards that can participate in the offensive strategy, leaving Evil high and dry most of the time and easily stopped. The strategies that they can most easily and consistently deploy are swinging wide and control. This actually makes for a deadly combination. Each time they use a spot-removal card, the field becomes filtered such that the opponent’s field is relatively weaker. Not just in number but in quality as well, since you as the Evil player want to target what hurts them the most.

As for the wide method, Evil excels at this. With good (and unbreakable) Silver champions as well as tons of token producers, it’s trivial to get this engine going. When attempting, you’ll want an easy way to get 3 Demons or 6 Zombies to try this. Force the opponent to block your unbreakables or big stuff, then attack individually with each token/silver to deal damage over what they can afford to block realistically (using groups to threaten kills where applicable). This method is extremely weak to board wipes. If a board wipe hits, it might not just stagnate your strategy but potentially force you to minus if you overextended to get your tokens and silvers out. In general, each gold is worth 5 zombies or 3 demons. In addition, if you used any of your spot-removal before the next board wipe, that also counts against cards that you minused. Be very aware of this as you play an Evil deck. Try a low-cost way of baiting out the first board wipe early. This can cause an opponent to waste a turn and leave you with free-reign to use your control and tokens for 7-8 turns if the game lasts that long.

However, you always have the ability to respond to threats. Don’t worry if an opponent board wipes after playing a threat and having it broken. This generally indicates that you have wrecked their main play and they’re doing damage control trying to drain your hand. That’s the moment you should immediately stop playing conservatively since you know they’ve used up a threat and a board wipe. Aggro hard.

Note about board wipes and this particular deck: This deck is not weak to board wipes even if its main offensive strategy can be. This is because of its ability to dodge AOEs. Any time you have lots of silvers with Blitz, you can easily recover from a just-played board wipe. The same goes for some golds with blitz and anything unbreakable on your turn. Trihorror also dodges board wipes due to its ability and Final Task can bring back Trihorror, unbreakable stuff or just whatever is needed. Corpse Taker can immediately return something after an opponent board wipes so you can just re-play it. If you play smart, growing your field back from a board wipe is trivial in the deck on purpose.

Legend for deck keypoints:

  • OPP – Counts as playable on the opponent’s turn. This is essential to keeping good rhythm and affecting game play every single turn. Doesn’t count re-usable.
  • DRW – Draws at least 2 cards, or is a draw engine. Required to keep playing cards every turn including on the opponent’s turn, especially if you’re board wiping.
  • TKN – Used for anything that helps you swing wide (or produce Tokens which can also swing wide). Main offensive strategy. Doesn’t necessarily only mean “Tokens”.
  • CTL – Control. Spot-removal used to control threats on the field and filter the opponent’s best Champions away.
  • MVP – Don’t squander these as they’re your best cards. Deck has more MVPs than usual due to specific plays.
Demon Nuke
Silver 0: 15

3 Corpse Taker – Dodge a board wipe or opponent’s control, re-use MVPs or Trihorror, situational use. MVP

3 Wither – Used to wipe out other token strategies and 18/22 or 82% of Silvers (includes Tokens),  6/51 or 12% of Golds cards in base set or 33% of Champions total. Can also screw discards. CTL OPP

3 Dark Knight – Great recovery from a board wipe and works for your own as well. Augment your wide swinging with Dark Knight but don’t play it too early. TKN OPP

3 Thrasher Demon – Recovery from a board wipe and always trades up. Used for aggro. TKN

3 Guilt Demon – Recovery from a board wipe and can screw the opponent’s discard so they can’t Recycle. Use that sparingly as you have Necromancer.TKN OPP

Gold 1: 45

Removal: 25
3 Murderous Necromancer – Major threat the opponent must immediately kill. Provides a turn of good defense and repeated kills. Can help with offense potentially. TKN CTL

3 Medusa – Has a blocking body that can ambush for control too. One of the best cards for control.OPP CTL

3 Dark Assassin – Yet another threat like Murderous Necromancer but can be used immediately and doubles as an attacker. CTL

2 Angel of Death – Great AOE if you want and potential Air damage.

3 Apocalypse – Run mostly for the draw but the deck must have AOEs to gain advantage sometimes. Many other decks will out-body you, hence the large amount of board wipes. OPP DRW

2 Drain Essence – Kill spell for all the Silvers in the game and 37/51 or 72% of Golds plus the life gain rivaling that of Inner Peace makes for an excellent poptart. This goes doubly well with your other control cards which will naturally filter out anything that has 10+ defense. OPP CTL

3 Bitten – Generic control but works best on the opponent’s turn unlike Inner Demon. Most control will likely be played on the opponent’s turn. OPP DRW CTL

3 Inheritance of the Meek (Good) – AOE specifically for banishing out anything that isn’t a token, letting you often swing for game. This results in Inheritance of the Meek often being your endgame solution if drawn. Note: You can board wipe with this during an opponent’s turn! OPP DRW TKN CTL

3 Zombie Apocalypse – A great AOE to play when your token population is low, since you don’t get anything back for them. Works well at converting used up Silvers and Trihorror into masses of Zombies. If you have Wither in hand, you can disgustingly wipe out the opponent’s new toys as well. Note: You can board wipe with this during an opponent’s turn! OPP DRW TKN

Offense: 14
3 Trihorror – I would call this “MVP” if it wasn’t usable basically any time. Trihorror is something you actually want to slap down ASAP since it has breakthrough and you lose nothing if it dies, in fact he just splits into equal power and defense worth of Demons. This card is ridiculous and can be used with Final Task for stupidity as well as Corpse Taker to frustrate an opponent. This is also the best body in Evil. TKN

3 Infernal Gatekeeper – Main token generator. Be careful when you play this card as it’s usually a huge target the moment it hits the field. Try to ally every single turn, burning your health with you. If possible, resurrect a Righteous champion or use Drain Essence to replenish this HP. Reconsider if you mulligan 4+ cards in your opening hand how many you can afford to get. Generally rule of thumb is no more than 4 Demons from one Infernal Gatekeeper or you tend to suffer greatly during boardwipe. However, Inheritance of the Meek can turn extras into game. TKN MVP

2 Demon Breach – Used seldomly unless a board wipe was just played. Demon Breach is great on your own turn but only works on an opponent’s if you have no need for draw or have no control cards. On your turn, Demon Breach explodes into 3 demons and can come back any time you have a spare gold laying around to help pay for loyalty and re-play it. OPP TKN

3 The Risen – Can swing for game if there’s a clear field from an AOE set up previous turn. Also useful for a fast 9 extra damage to the wide swinging wall of tokens that turn, plus the extra power for everything else. Doesn’t count as OPP since it’s very bad at that moment. TKN DRW

3 Necromancer Lord – Most important card in the deck and can be used to recover from a board wipe. Use this sparingly and smartly and you can easily go for game. Remember the types of offense strategies (burn/freeze/air/breakthrough) and try those, or just go for blitz. Proper use of this requires dodging opponent’s Recycle attempts and knowing the better cards in the game. MVP

Utility: 6
3 Thought Plucker (Sage) – Pure draw and hand filtering engine. OPP DRW

3 Final Task – Combos with Trihorror effectively and useful with many others. Grab Corpse Taker on an opponent’s turn, then use Taker’s ability to grab a Champion you can permanently call next turn. Use it on an unbreakable. Use on Necromancer Lord to get a permanent Champion of your opponent’s instead of temporary. Thought Plucker on your turn gives you a total of Draw 2 Discard 2(opponent) which is far more than Final Task’s alternate effect. Murderous Necromancer for 3 zombies immediately and a kill. Angel of Death for an AOE with wings. Then there are a myriad of opponent’s cards!. OPP DRW

dark_knight
thrasher_demon
wither
guilt_demon
thought_plucker
murderous_necromancer
infernal_gatekeeper
trihorror
medusa
necromancer_lord
the_risen
final_task
drain_essence
demon_breach
dark_assassin
bitten
apocalypse
zombie_apocalypse
angel_of_death
inheritance_of_the_meek


Key Point stats

Keypoint totals:

  • OPP – 12 unique, 34 total cards. 57% of the deck works well on the opponent’s turn.
  • TKN – 10 unique, 29 total cards. 48% of the deck swings wide.
  • DRW – 7 unique, 21 total cards. 35% of the deck can give net hand advantage after it’s played.
  • CTL – 7 unique, 20 total cards. 33% of the deck can filter the field and answer threats.

Intersection – 173% total, spillover (intersection) of 73%. Cards, on average have 1.7 of the deck’s key points on each card. Therefore each draw in this deck has a quality rating of 1.7.


Draw quality (+10). Reminder this is extra over the normal 100%.

Please note that card quality does not mean anything objective. It’s a subjective self-measure of how well the deck does what it says it wants to. It measures synergy.

Card Changes

Right now, there are only 6 cards (10% of the deck, or 1/10 draws) that can confound loyalty/ally.

  • Loyalty/Ally – 6 unique, 17 total cards. 28% of the deck requires at least two other Evils.
  • Removable – 1 unique, 2 total cards. 5% of the loyals can be removed if something better is used.
  • Confound – 2 unique, 6 total cards. 10% of the deck screws up 28% of the deck. Low screw rate and basically only ever need the 3 minimum cards to activate a loyalty.

Removable Cards:

  • Angel of Death. This card is great but basically exists for you to dodge your own AOE as explained before and then get an extra attacker out of it. Not quite synergistic and can be replaced by Avenging Angel (Good).
  • Drain Essence. It’s pretty extra in this deck but works well for the purposes of healing. If you want something else that can help you stay alive while benefiting from existing control, try Drinker of Blood which also dodges your AOEs.
  • Demon Breach. While it’s part of your attacking strategy, Demon Breach is just one of those cards that can easily be changed into something else without much loss occurring at all. It’s helpful but can sometimes fall flat. For something that really helps you swing wide, try Deadly Raid (Sage).
  • Wither. Can be removed for the final copies of Deadly Raid and Avenging Angel if you don’t have all three of each in. Keep any remaining copies.

This is also covered in “Deck Stats” but here is a comprehensive list of the major cards recommended for this deck if you swap anything (within Base Set).

avenging_angel
deadly_raid
drinker_of_blood

Listed in order of desirability. Check below for what to replace and the updated Deck Stats.

Replace:

  1. Angel of Death
  2. Wither

Deck Stats:

  • No positive change. Purely for aggro and protection.
  • Small amount of control omitted.

Replace:

  1. Demon Breach
  2. Wither

Deck Stats:

  • OPP +5% (both are bad on opponent’s turn but this one has draw)
  • DRW +5%
  • Small amount of Control omitted.
  • Overall +10% (change to intersection/card quality)

Replace:

  1. Drain Essence
  2. Wither

Deck Stats:

  • OPP -3%
  • CTL -3%
  • Overall -6% (change to intersection/card quality)
  • Change is purely for more bodies, more AOE dodge and draining/direct damage which is consistent

Stats with All Changes

  • OPP59% of the deck works well on the opponent’s turn.
  • TKN48% of the deck swings wide.
  • DRW40% of the deck can give net hand advantage after it’s played.
  • CTL30% of the deck can filter the field and answer threats.

Intersection – 177% total, spillover (intersection) of 77%. Cards, on average have 1.8 of the deck’s key points on each card. Therefore each draw in this deck has a quality rating of 1.8.


Draw quality (+10). Reminder this is extra over the normal 100%.

New loyalty problems:

  • Loyalty/Ally – 5 unique, 15 total cards. 25% of the deck requires at least two other Evils.
  • Confound – 4 unique, 12 total cards. 20% of the deck screws up 25% of the deck. Not a horrible screw rate, about a comfortable need of 4 cards in hand for Loyalty.

Recommended change method for maximum deck efficacy. No efficiency changed, only card quality.

Stats with 2 Changes

Using only Avenging Angel and Deadly Raid, the stats become the following:

  • OPP62% of the deck works well on the opponent’s turn.
  • TKN48% of the deck swings wide.
  • DRW40% of the deck can give net hand advantage after it’s played.
  • CTL33% of the deck can filter the field and answer threats.

Intersection – 183% total, spillover (intersection) of 83%. Cards, on average have 1.8 of the deck’s key points on each card. Therefore each draw in this deck has a quality rating of 1.8.


Draw quality (+10). Reminder this is extra over the normal 100%.

New loyalty problems:

  • Loyalty/Ally – 5 unique, 15 total cards. 25% of the deck requires at least two other Evils.
  • Confound – 4 unique, 12 total cards. 20% of the deck screws up 25% of the deck. Not a horrible screw rate, about a comfortable need of 4 cards in hand for Loyalty.

Recommended change for less efficacy but the same efficiency as the above with slightly less card quality than the default.

This deck tends to be very fun to play for someone who enjoys field control and tempo-geared decks. Your own champions are about middle-power when they come down and you can filter your opponent down to that level with control cards. You’ll basically never run out of hand either. Always having a board wipe in hand for the right moment is crucial in Epic and this Evil deck has it in spades. Being able to answer any threat feels so safe and comfy. Evil really lacks decent bodies and hardcore Demon support in the base set but we make due with what we have here. Using a few “go for game” cards like Inheritance of the Meet, The Risen, or Deadly Raid can make the game end very quickly and suddenly if the opponent is not prepared.

This deck is easily frustrated by anything that can pull out a lot of healing while successfully fogging it. Thankfully, it’s difficult to actually pull something like that off against this deck. It can also become very easily frustrated by human token spam as it lacks much air or breakthrough.

Top

Epic: Good Deck

Goodbanner

If you haven’t checked out the base set Good analysis, do that now!

In Epic, you really need to choose one of only a few offensive methods to get in your damage and win. You can go with Airborne, Breakthrough, burn, swing wide, control, or freeze. This deck chooses to exploit the fact that Good has the best airbornes in Epic and use this fact to its advantage to beat out other Airborne strategies, as well as fogging direct damage (and some Breakthrough) with life gain. It can’t really do anything about freezing except for Ceasefire. Make sure you’re wiping the field regularly to stop their damage buildup on the ground from getting too intense.

Common Plays

Use your cards listed in the decklist’s Offense category, to swing in the air, dealing damage. Here’s how you should do this in general, based on a few factors:

  1. Always swing if the opponent has no blockers in the air. Use just one of your champions to attack if you think you might have to block.
  2. With Gold Dragon, swinging into air blockers is fine if you can gain some health back. Try to keep the Dragon up so you don’t lose it.
  3. Ambush in Angelic Protector (or use Brave Squire) on your own turn if they block your air and it would die. It now won’t die.
  4. Don’t try to use removal when attacking as a group. You’ll still be counted as blocked. Use group attacks if you need to reduce the opponent’s opportunities to play gold cards.
  5. Always use “bait” cards before your MVPs. Bait is stuff that the opponent must kill such as High King, or else they’re going to eat dirt every turn.
  6. Thundurus should usually be played before Gold Dragon. It’s bait, Gold has blitz anyway, Thundurus can block for a turn, and it doesn’t matter if it’s telegraphed since Gold Dragon is worth more to you.
  7. Always try to pair Lord of the Arena with Faithful Pegasus over other humans since it gives you 13 damage in the air.
  8. High King and other removal should always target firstly, threats, then air blockers, then other things. Threats are other things similar to High King that force you to respond or the opponent will gain too much ground.
  9. Use Brave Squire on your air attacks when you see an opening, since you get the protection and the (practically) double damage.
  10. Ceasefire is best used when an opponent starts with their weakest champion.

Offense Priority

Play attackers in this order of priority:

  1. Angel of Light/MVP if you will die without gaining the life.
  2. Angel of Mercy if an MVP is dead (grabbing in Offense Priority order)
  3. Thundurus if playing Gold Dragon next turn, or needing bait for either MVP
  4. MVP (Avenging Angel and Gold Dragon)
  5. Angelic Protector if an MVP is attacking on your turn. Or if one is out and it’s the opponent’s turn and they are attacking.
  6. Angel of Light if you have nothing else.
  7. Angel of Mercy if you have nothing else (though at this point, you can probably resurrect any of the above).

Opponent Turn Priority

General case for how to spend your gold on an opponent’s turn:

  1. Inner Peace/Angel of Light if you will die without the life gain.
  2. Stand Alone if you will die without it or as “nuke timing” to open up a blitz attack on your next turn
  3. Ceasefire if the opponent will attack with a total of 10+ damage outside their first attack, especially if they attack with their weakest first.
  4. Banishment if something must die on the opponent’s turn to live/protect something, etc.
  5. Ambush blocker if you will die without it. (Choose the least valuable)
  6. Resurrection/Angel of Mercy if an MVP is dead or will die
  7. Brave Squire/Angelic Protector if an MVP, Thundurus or Angel of Mercy (with those targets) might die
  8. Noble Unicorn
  9. Use various Draw 2 effects if your own hand is 3 or less.
  10. Ambush in an Attacker setup (see Offensive Priority)
  11. Courageous Soul to set up a decent attacking turn.
  12. Other things (Inner Peace because you want to, Angel of Light because why not, etc.)

Legend for deck keypoints:

  • OPP – Counts as playable on the opponent’s turn. This is essential to keeping good rhythm and affecting game play every single turn. Doesn’t count re-usable.
  • AIR – Airborne, as is required for this strategy to work. Higher number means the deck has lower overall Power but is more consistent.
  • DRW – Draws at least 2 cards, or is a draw engine. Required to keep playing cards every turn including on the opponent’s turn, especially if you’re board wiping.
  • PRO – Protection. This could be anything from unbreakable to untargetable but basically means this unit provides or has protection from enemy cards so that the main strategy won’t crumble.
  • MVP – Don’t squander these as they’re your best cards.
GOOD Stuff
Silver 0: 12

3 Faithful Pegasus – Replaces itself and can make our non-airborne into fliers so they aren’t uselessly sitting on the ground. Very devastating with Lord of the Arena. AIR

3 Courageous Soul – Playable on opponent’s turn. The buff still happens even if he’s blocked. Can boost our air army in case we get two or more at a time. OPP

3 Brave Squire – Use this to go all-in with an attack, knowing it can’t die, or use it to protect your best cards and block. PRO OPP

3 Priestess of Angeline – Life gain every time you play a card and it threatens to block when you’ve used it three times. Just using it three times is sufficient but more is better.

Gold 1: 48

Removal: 18
3 High King – Repeated use of banishment. Using it on the opponent’s turn to react to new things can cause it to be destroyed, so normally you would hold this until needed and only snipe things you can see.

3 Palace Guard – More High King but has a blocker body and can be used with Faithful Pegasus.

3 Banishment – More spot-removal but draws a card if played on your own turn. OPP

3 Lord of the Arena – At first it may seem like an attacker but really it’s a kill spell. Since it’s opponent’s choice, it’s less good than High King but it can be used with Faithful Pegasus for massive damage.

3 Divine Judgment – AOE removal, generally one of the things you wait on to start the field over. Your High Kings and Thundurus will be left alone! OPP DRW

3 Stand Alone (Sage) – Chosen for its specific help to this deck, allowing a selective AOE. Using this while you both have airborne is probably a bad idea. 10% of the deck is AOEs so you get these on average right when you need them. OPP DRW

Offense: 18
3 Thundurus – There’s no synergy in this deck for Thundurus in this version. However, he makes a great unbanishable for your Divine Judgments and can tank just about anything in the air and on the ground. Thundurus is excellent when paired with Gold Dragon and just fine as a single attacker in the air on his own. AIR

3 Gold Dragon – Makes you practically invincible if more than it attacks. Makes you definitely invincible if attacking with Thundurus. AIR MVP

3 Angel of Light – Basically Inner Peace with wings. Play this as an ambush at the end of an opponent’s turn or when you can block safely for 6. AIR OPP

3 Avenging Angel – A card so good it can go in almost any Epic deck. This card makes you invincible and practically has to be responded to on the turn it’s played. AIR PRO MVP

3 Angelic Protector – Use this card on the opponent’s turn (usually) to stop target/break of your MVPs or your attackers, then it starts becoming an attacker. AIR PRO OPP

3 Angel of Mercy – The most disgusting protection. Since you can ambush this in on the opponent’s turn, you can basically just let stuff die and then bring it back. Used on MVPs or attackers. AIR PRO OPP

Utility/Defense: 12
3 Noble Unicorn – Draw engine. Bring it out on the opponent’s turn at all costs so you can get the benefits immediately. OPP DRW

3 Inner Peace – Card is ridiculous once you set up a couple blockers. You can get this back over and over and spam it on the opponent’s turn. Potentially removable for Wave of Transformation or Memory Spirit. It’s in this version since it serves as a buffer and OPP. OPP

3 Ceasefire – A very unpopular card that gives mad draw while essentially skipping the rest of the opponent’s turn. Be sure to get a blocker ready to go since you have to throw one under the bus. OPP DRW PRO

3 Resurrection – Less powerful than Angel of Mercy but essentially gives us more copies of her effect. Be sure you save your gold for this if you know you need protection on an MVP. OPP PRO DRW

faithful_pegasus
brave_squire
courageous_soul
priestess_of_angeline
stand_alone
inner_peace
divine_judgment
high_king
banishment
ceasefire
resurrection
noble_unicorn
lord_of_the_arena
palace_guard
angel_of_mercy
angelic_protector
thundarus
gold_dragon
avenging_angel
angel_of_light

Key Point stats

Keypoint totals:

  • OPP – 12 unique, 36 total cards. 60% of the deck works on the opponent’s turn.
  • AIR – 7 unique, 21 total cards. 35% of the deck swings in the air.
  • DRW – 5 unique, 15 total cards. 25% of the deck can give net hand advantage after it’s played.
  • PRO – 6 unique, 18 total cards. 30% of the deck can protect you or your cards.

Intersection – 150% total, spillover (intersection) of 50%. Cards, on average have 1.5 of the deck’s key points on each card. Therefore each draw in this deck has a quality rating of 1.5. This could potentially be increased by using some Sage cards but would reduce ally and loyalty probabilities.


Draw quality (+10). Reminder this is extra over the normal 100%.

Please note that card quality does not mean anything objective. It’s a subjective self-measure of how well the deck does what it says it wants to. It measures synergy.

Card Changes

Right now, there are only 3 cards (5% of the deck, or 1/20 draws) that can confound loyalty/ally. Using Memory Spirit which is the first choice, would drop that to 1/10 cards but may not be so bad.

  • Loyalty/Ally – 6 uniques, 18 total cards. 30% of the deck requires at least two other Goods.
  • Removable – 3 uniques, 9 total cards. 15% of the loyals can be removed if something better is used.
  • Confound – 1 unique, 3 total cards. 5% of the deck screws up 30% of the deck. Very low screw rate and basically only ever need the 3 minimum cards to activate a loyalty.

Removable Cards:

  • Inner Peace. I mentioned this in the deck list but Inner Peace can be removed for something like Memory Spirit (Sage) which hits AIR, OPP and can re-use events such as Ceasefire or your AOEs. Right now, it’s being used to repeatedly trigger Loyalty/Ally over and over, so this may be the last one you attempt to remove. If it does get removed and you want something similar in its place, go for Mighty Blow (Wild, DRW, OPP) which has one keypoint over Inner Peace and can slap down at the right moment to win the game 2 turns earlier. When the opponent is at 14-16 life and you have one attacker, Mighty Blow is excellent. Its uses are going to be mostly limited to openings that you have created, however.
  • Palace Guard. Basically just here for the body. It’s a great card but if an attacker such as Winter Fairy (Sage, AIR, DRW) goes here, it can give draw. The deck has a lot of removal as-is.
  • Lord of the Arena. It’s re-usable Palace Guard so you should consider keeping this over it if you remove only one. And definitely remove this before Inner Peace as it’s one of the repeated-use ally cards. While its 2-card combo is really amazing, Lord of the Area is basically just removal you have to work for and is worse than High King most of the time. Though it and Palace Guard are both good blockers and that’s why both are still in the deck. Possibly remove for Winter Fairy, Wave of Transformation, or Kong if you really want something beefy that can kill. I recommend keeping Lord over Kong since it has blitz. Try to replace with something that has ambush or blitz and can be a legit attacker (specifically, Memory Spirit if you don’t have it in already).
  • Priestess of Angeline. She’s really just here for the extra life on top of Angel of Light and Inner Peace. If you do replace cards such that you now have at least 6 Sage that cost gold, you can run three Muse (Sage, OPP, DRW) over Priestess of Angeline.

This is also covered in “Deck Stats” but here is a comprehensive list of the major cards recommended for this deck if you swap anything (within Base Set).

memory_spirit
muse
winter_fairy

Listed in order of desirability. Check below for what to replace and the updated Deck Stats.

Replace:

  1. Palace Guard
  2. Lord of the Arena

Deck Stats:

  • OPP +5%
  • AIR +5%
  • Overall +10% (change to intersection/card quality)

Replace (only if using 6 gold Sage):

  1. Priestess of Angeline

Deck Stats:

  • OPP +5%
  • DRW +5%
  • Overall +10% (change to intersection/card quality)

Replace:

  1. Palace Guard
  2. Lord of the Arena
  3. Consider Memory Spirit and Muse first!

Deck Stats:

  • AIR +5%
  • DRW +5%
  • Overall +10% (change to intersection/card quality)

Stats with All Changes

  • OPP – 14 unique, 42 total cards. 70% of the deck works on the opponent’s turn.
  • AIR – 9 unique, 27 total cards. 45% of the deck swings in the air.
  • DRW – 7 unique, 21 total cards. 35% of the deck can give net hand advantage after it’s played.
  • PRO – 6 unique, 18 total cards. 30% of the deck can protect you or your cards.

Intersection – 180% total, spillover (intersection) of 80%. Cards, on average have 1.8 of the deck’s key points on each card. Therefore each draw in this deck has a quality rating of 1.8.


Draw quality (+10). Reminder this is extra over the normal 100%.

New loyalty problems:


  • Loyalty/Ally – 4 uniques, 12 total cards. 20% of the deck requires at least two other Goods.
  • Confound – 4 unique, 12 total cards. 20% of the deck screws up 20% of the deck. Basically, you’ll need 4 cards in hand most of the time to activate one Loyalty.
  • Reminder that technically Muse doesn’t cause a problem for the Ally cards, only Loyals, so this math is slightly off (looks worse than it is).

Recommended change method for maximum deck efficacy. Less efficient method, but not prohibitively.

Stats with 2 Changes

Using only the first two changes, Memory Spirit and Muse, the stats become the following:

  • OPP – 15 unique, 45 total cards. 70% of the deck works on the opponent’s turn.
  • AIR – 8 unique, 24 total cards. 40% of the deck swings in the air.
  • DRW – 6 unique, 18 total cards. 30% of the deck can give net hand advantage after it’s played.
  • PRO – 6 unique, 18 total cards. 30% of the deck can protect you or your cards.

Intersection – 170% total, spillover (intersection) of 70%. Cards, on average have 1.7 of the deck’s key points on each card. Therefore each draw in this deck has a quality rating of 1.7.


Draw quality (+10). Reminder this is extra over the normal 100%.

New loyalty problems:

  • Loyalty/Ally – 4 uniques, 12 total cards. 20% of the deck requires at least two other Goods.
  • Confound – 3 unique, 9 total cards. 15% of the deck screws up 20% of the deck. You’ll need 4 in hand for some loyalties but not all of them.
  • Reminder that technically Muse doesn’t cause a problem for the Ally cards, only Loyals, so this math is slightly off (looks worse than it is).

Recommended change if you prefer a middle ground on extra efficacy while only giving up a small amount of efficiency.


My final thoughts on this deck are that it’s very fun to play and when it “goes off” it’s almost sure to win. It has to go off, though. Most specifically, the trends I notice winning the most games are the following:

  • Using at least 1 MVP for at least 3 of the game’s turns total
  • Nuking for at least +3
  • Drawing at least 6 extra cards off things like Noble Unicorn
  • Using Thundurus’ ability ever
  • Attacking in the air 5 turns

If you can do any of these, you usually end up winning. If you can do several, you can significantly increase the chances that you win. Though Good is widely regarded as the worst pure alignment in base set (and I can agree with that), the problems it has can be mitigated if constructed and played correctly. This is my attempt to put it as on-par with other decks as possible. By giving it minimum 1.5 card quality, it means the draws in this deck go significantly farther than a generic Good deck. At the 1.7 modified version (which I prefer, actually) the card quality is so significant that you can get 2-3 of those winning points bare minimum every game.

Its goals seem good enough that the card quality is leaning more toward an objective measure of how good it is, rather than a pure synergy assessment. Swinging in the air, drawing cards and playing on the opponent’s turns are some of the most fundamentally necessary things in all of Epic. Protecting the ability to swing in the air is very nearly the same as doing more of it as well.

Top