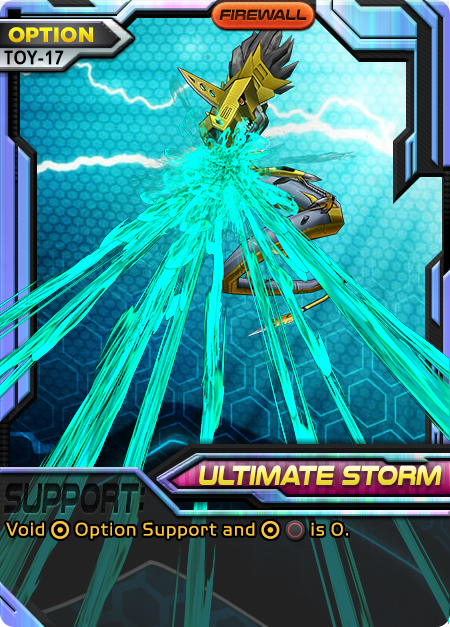
All posts by: Alice White

New PendulumZ Promo — Tropiamon

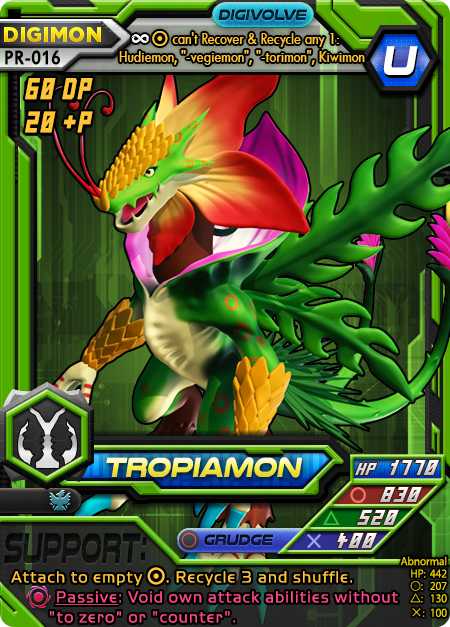
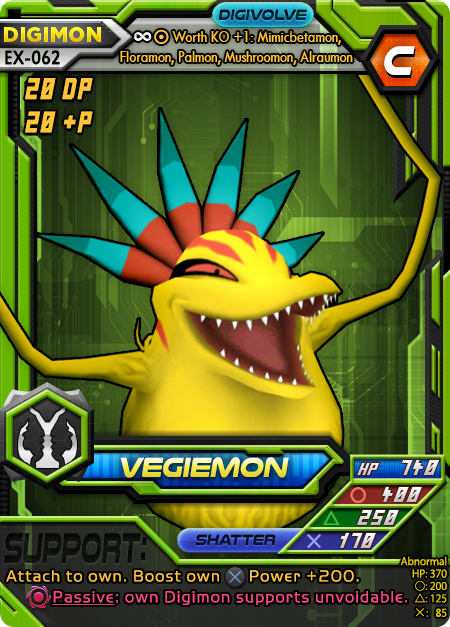
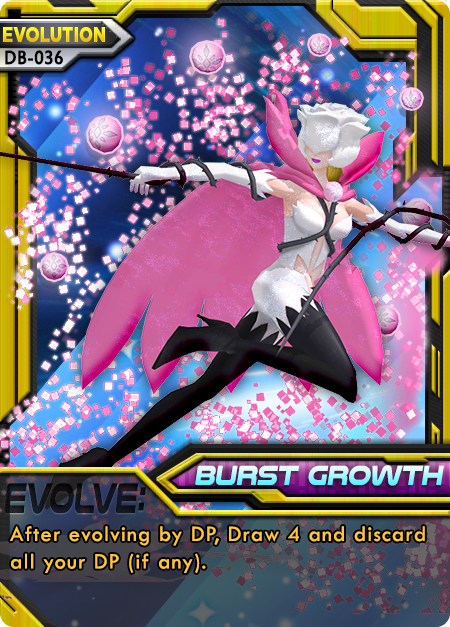
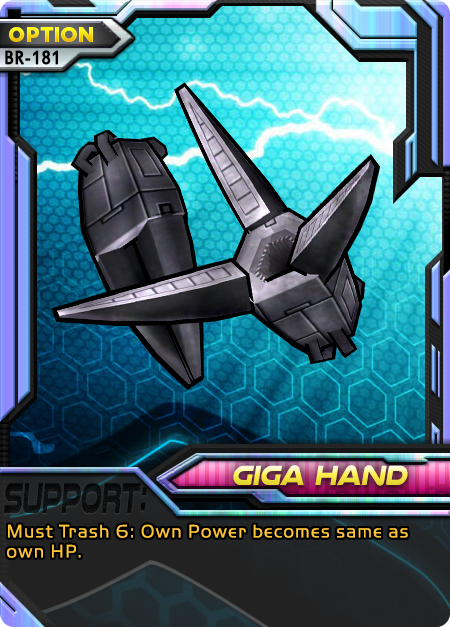
I hope everyone’s still excited from the late October promos. As we welcome the harsh winter with solemn contemplation, let’s also celebrate that the Pendulum Zs have made their way into the hands of many happy people. Hopefully, they can be little packets of joy. I know I got a full set of wave 1 and they’re very fun! So here’s a super-early card for the Pendulum Z wave 2, Tropiamon! It’s a harsh, poisonous monstrosity that makes certain attack abilities completely unusable. Tropiamon is a vote for a more nail-biting game with counters and to-zero, and shuns self-satisfying nonsense like Jamming, Draw, and Crash. Look out Mystimon… And on top of that, it sports the new Grudge (hypocrite), and has a devastating bonus stopping all opponent HP recovery effects; plus being able to recycle any 1, which is super powerful and nicely sets up supporting from the top of the deck with your best trashed card, even if it’s your ACE!

New Promo on Samhain — Mystimon

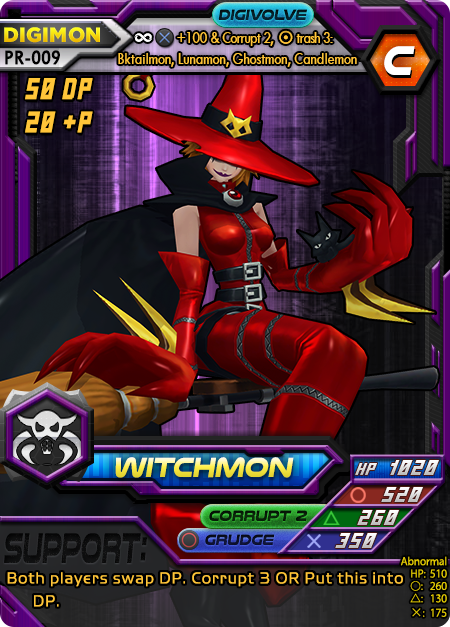
Yesterday, I hinted that the pointy hats may not be over. It’s still Samhain, so let’s go. Stepping over the hedge of the Otherworld as a complete wizard, Mystimon makes its appearance! Mistymon? Mysticmon? Whatever, it’s mystical and from Witchelny! Let’s dive right into the new stuff it has.

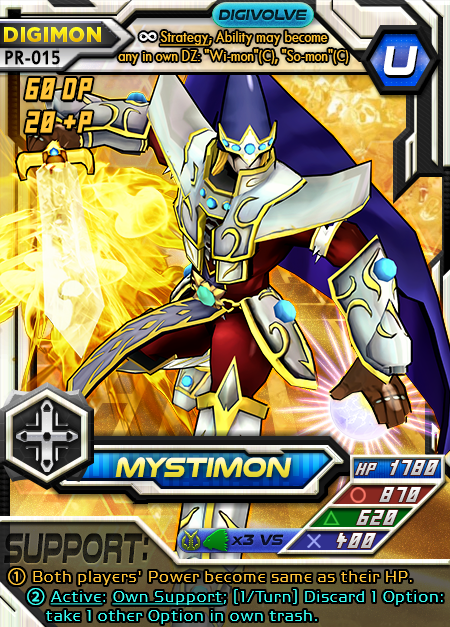
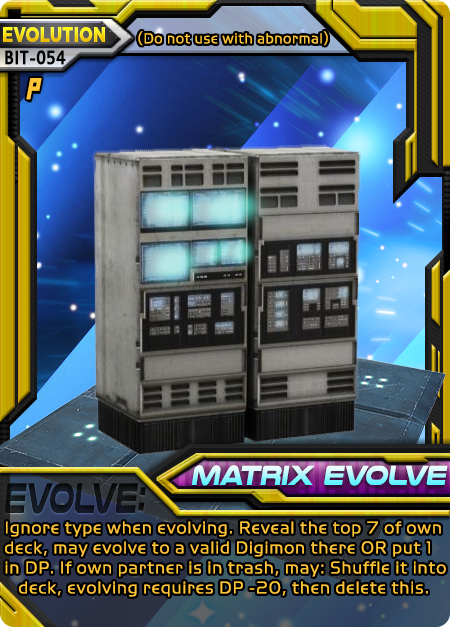
Evo-box first: The odd thing you may notice is “Wi-mon” and “So-mon” both Level C. The rules for quotation names is that you substitute the “-” part for anything or nothing. So “Wi-mon” for example would be Witchmon or Wizardmon. If it had “Devi-mon”, then Devimon and Devidramon work. The actual permanent effect allows you to change its cross ability every Strategy phase, right at the start. You can pick from any attack ability in the DZ. So if you had BIT-006 Hyogamon in there, you could change your ability into  Counter (of course, your Power is now 0 as usual). Bear in mind, that change is a lingering effect and will dissipate at the end phase. But this works to your advantage in case you want its x3 VS back! You can always pick another ability next turn. Here’s a list of what Digimon exist that you can use this with:

  • Witchmon
  • Wizardmon
  • Soulmon
  • Sorcerymon

All with pointy hats of course. Rulers can’t evolve from normal types, so using names is necessary. Don’t forget they also can’t be played as Abnormal (hence no stat block).

Support effect and Active effect: You may notice some odd stuff going on here. The bubble number ① and ② were added to help with clarity because its box is a bit confusing without them. Both the numbers and the cyan text denote a break in effect. If you SUPPORT, you get ①, and both players will have their power become the same as their HP. Basically, more powerful Crash but…for everyone. So play it at the right time. This is very much the feeling of Nightmare effects!

For effect ② (cyan text), use this from the Active spot like any other Passive ability. When your active is Mystimon, you’ll be able to Discard 1 Option as a cost to then draw a different option from your trash. Spellcycling! You can only use this during times on your own support phase when you can play a card though, so right at the start of the phase and when you are supporting that turn too. Try to think of some interesting combos and bear its limitations in mind.

If you want to know the interesting story behind how I did this art, tumblr post.

New Promo on Samhain — Wizardmon

HAPPY SAMHAIN!

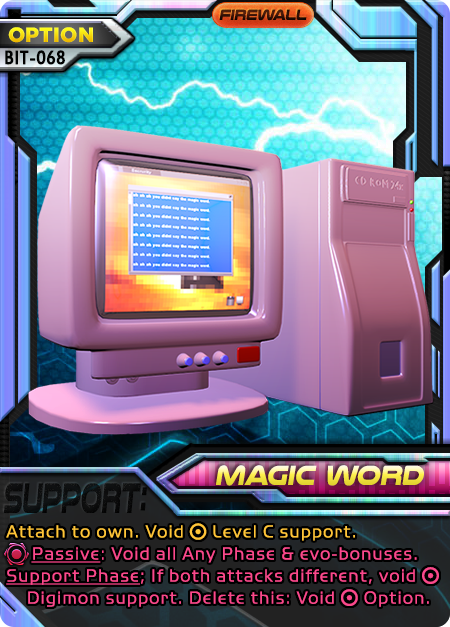
SIX! Six Samhain holiday promos. Who is on sixth? It’s Wizardmon, just popped through the gateway from Witchelny and ready to try a new array of spells. It has a pretty special lineup of effects. Firstly, it has two attack abilities which aid in casting. Wizardmon’s  is lightning elemental, for critical damage against airborne types. But the is “Magical Game“, its card-throwing ability that messes with randomness and entropy—appropriately giving you some nifty corruption to control your opponent’s draws. Its evo-bonus signifies Wizardmon having some time to cast enchantments and wards after evolving, including the unique ability to create a magical barrier voiding all effects (evo-bonuses), though it’s only strong enough to ward off Level C Digimon.

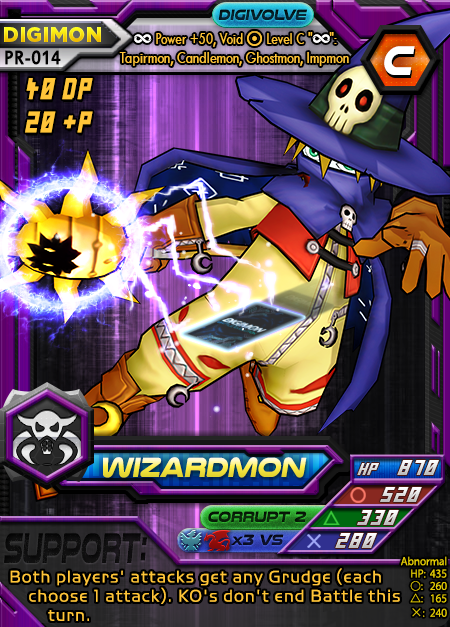
The real draw is its Support. Both players get Grudge and pick any attack for their new grudge. Nightmare type has a tendency to use powerful effects but…on both players. In this case, you try to guess what attack your opponent used, both attack orders don’t meaningfully change, and then if you guess right you get doubled power and set revival equal to that power. Normally the power and revival are either/or. But the effect continues! “KO’s don’t end Battle this turn.” means what it says. If either Digimon is KO’d, don’t immediately skip to the Battle Phases’ “Check for a Digimon KO” step. Instead, you proceed with any remaining attacks that weren’t skipped due to Counter. Yes, bear that in mind—Counter doesn’t let you double-dip on attacks if you also succeed with Grudge. In fact, only 1 attack would occur that turn (using the opponent’s damage against them). So let’s see what fun and creative ways you can use Wizardmon!

This concludes the Samhain pointy-hat promo run. Or does it?

New Promo for Samhain — Blue Comet

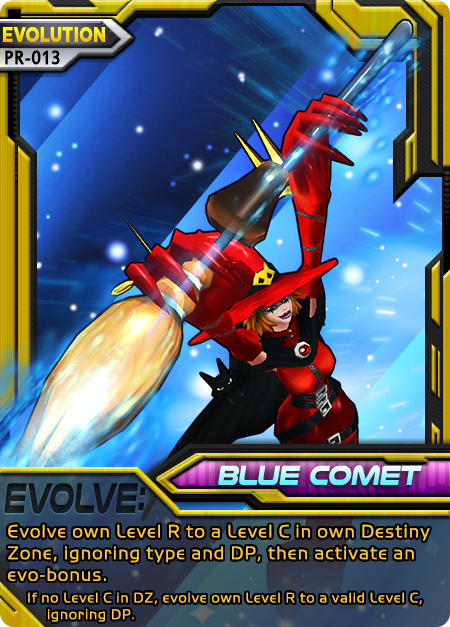
Only 4 days till Samhain! And with that, we have a fifth holiday promo—Blue Comet. Witchmon’s broom from the world of Witchelny is an incredibly fast, dimension-crossing transport. If you need a new partner right away, just air drop one in! Blue Comet lets you pretend a Level R you have is like a partner. If you’re out of DZ evolution targets, it’ll still let you use it as a very limited Digivice for Level C evolution from hand (that’s the small text). Since its so similar to Data Hijack, you could potentially have both in the same deck and really flesh out your partner-like experience. Bear in mind, while Hijack looks through the deck and gives DP, this ignores type and gives an evo-bonus.

New Promo for Samhain — Soulmon

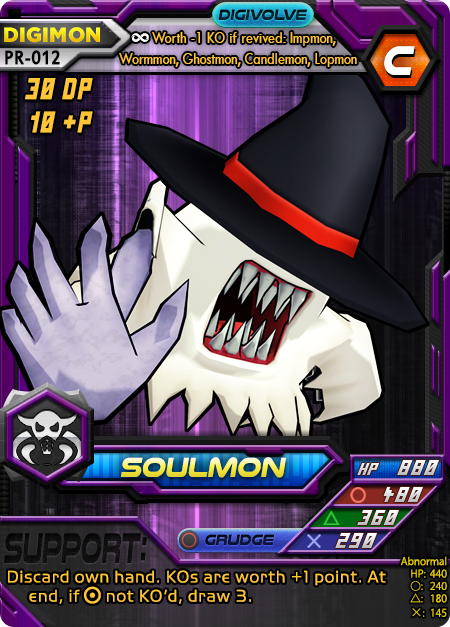
Another Digimon, another witchy hat. This is the fourth Samhain holiday card, rising from the grave with an army of magically-enchanted souls is…well, Soulmon! This is not quite as weak as the other version of Soulmon, nor as cheap. Grudge makes another return, as the necromantic magicks embedded in Soulmon’s code are highly appropriate for such an ability. But since it’s a master of death magic, many enhancements and wards are set up around its presence. When KO’d (during an evo-bonus), it is worth -1 point as long as it has revival set. Grudge provides easy access, but so does Miracle Ruby, Neodevimon, and others. While you may not plan on losing with this Digimon, but such a threat is always in use even when it is not being played, and can therefore influence opponent choices when they have an easy KO with circle. For the Support ability…no comment. Find your own fun!

New Promo for Samhain — Sorcerymon

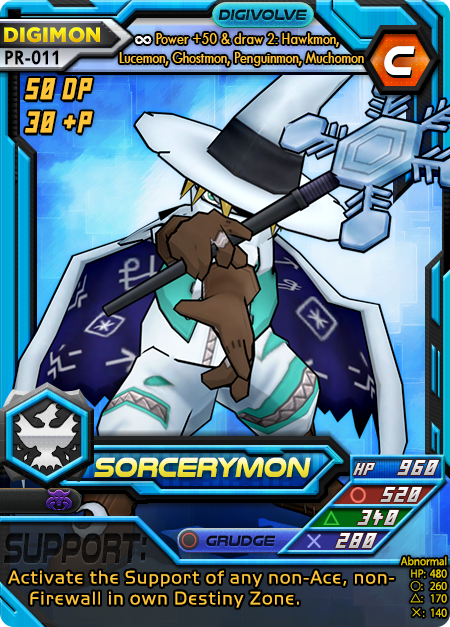
The third promo for the Samhain holiday is… Sorcerymon! Fine-tuned caster joins us from the alternate Digital World of Witchelny. Their sorcerers use a programming language that’s abstract enough, it basically resembles the spoken and written word. Spells. It’s spells. Sorcerymon loads up its spellbook with the support ability, straight from your Destiny Zone! Choose your effects wisely, since it means every decked copy of this sorcerer could be any one of up to 3 different spells.

New Promo for Samhain — Ghostmon

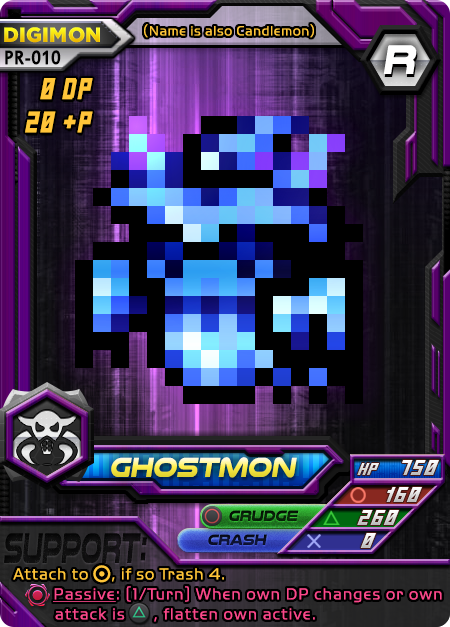
A new Samhain holiday promo card has arrived, pointy hat included! Ghostmon crawls out of the shadows of ruined buildings in a decaying forest. This is a new Digimon from the Pendulum Z, but we created our own DOT art anyway. Yeah, it was teased in the evo-box of the last promo. It’s quite loaded up with a high-endurance body, the ever-present new Grudge ability to revive from death and hit hard, an unprecedented Crash power on Level R, the ability to wipe out an opponent’s attachment, and a constant flatten source. To top it off, the section at the top makes Ghostmon able to fit in any decks that could use Candlemon!
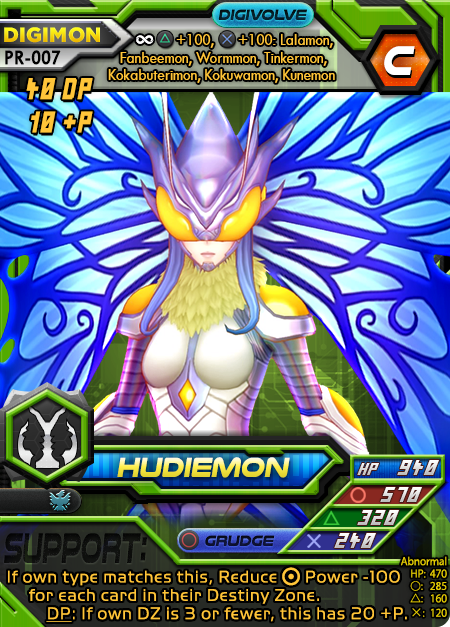
Design Diary — Flatten

If you’re looking for how Flatten works, check this article.

How it all started

In Digimon World, you could inflict an LCD status effect on an enemy Digimon called “Flat”. It reduced their 3D model to a DOT sprite like in the v-pets and caused them to use a weak attack. It seems pretty appropriate to include for any 3D Digimon game that wants to include DOT sprites as with set Bit Depth. At the time, I already had this mechanic planned but no theming. So reducing the opponent’s dimensions one by one until they pop out of existence made a lot of sense. Originally, the balance was centered around having to obtain 4 instances of flatten. This didn’t test well. It took far too long to 4-hit-KO even when it can pierce evolutions. The next step was to tweak that number until it felt right in many many games. There was one point where I was torn between requiring 3 flattens and a regular damage hit versus 4 flattens and I ended up just including both due to how supports could be used to add more flats. The 3 flats with damage requirement was slightly too powerful while 4 as a fixed amount was way too slow without a constant supply of support-based flatten. Full Article

Promo Release—Hudiemon & Chaosdukemon and new symbols

New promo cards!

Before the next errata list drops and an upcoming set is released, I’d like to give everyone a couple of cards to play around with that I think are pretty interesting.

There are also 2 new symbols created to make player’s lives a lot easier. In the past, there has been confusion about which evo-boxes give effects permanently (like Power changes) and which are one-and-done. With all new cards (and any that happen to be errata’d in the future), evo-boxes with permanent effects will have the Permanent symbol, denoted by a stylized lemniscate . These are only found in evo-boxes for bonuses, so other permanent effects won’t have the symbol.

The second symbol is to denote an opponent, marked by this target-looking thing . Originally, the “opponent” symbol was only needed for evo-boxes to both save space and clear up confusion about whether an effect is you, your opponent, or both players, but will now also be used in all effect boxes on any new cards. The word is just used so often that unlike permanent effects, I see no reason to make it specialized. This should save a lot of room, clear up a lot of confusion, and increase reading comprehension.

Both symbols’ meaning have also been added to the rules page.

New effect: GRUDGE.

Sounds menacing right? Grudge is the middle answer to threatening a particular attack between “to zero” and “counter”. It works the following way:

/ / Grudge: An attack ability or effect (granted similarly to Counter), which makes you attack second, double your Power against the specified attack, and revive with your Power as HP if you’re KO’d by that attack.

In technical terms, here’s how you play it during the Battle Phase when attack abilities resolve:

  1. Get a stack of 2nd Attack. This is like removing a stack of 1st Attack, including if it’s your turn. It doesn’t make you guaranteed to attack last like Counter.
  2. If used the attack specified on Grudge, double own Power.
  3. If KO’d when an opponent used the Grudged attack, revive with HP equal to your Grudge attack’s Power. Do not revive if that Power is 0. Note, you would not still get to attack after revival since that timing has passed. Revival happens after attacks.

It’s like a real grudge. You predict what attack your opponent will use, get a power boost, and insure yourself against KO. The opponent still receives a KO point as with any revival. In fact, the revive part follows all revival rules including a Level M no longer counting as 2KOs after that revival. Because the 2nd Attack of Grudge is not permanent as with Counter, you can still use the “1st Attack” ability to sort of cancel-out that effect and go by turn order. When you play Grudge, try to imagine your Digimon taking it to the face and having the poise to come back with something fierce, even if it’s from the grave. That should give a clear image of what’s intended. This can severely curb someone’s attempt to KO with a specific attack, such as a Circle which can 2-hit-KO your Digimon when it has Circle Grudge. Like a “to zero” or “counter” effect, this introduces an element of risk and prediction. This can also be an interesting way to punish 1st Attack, since that’s normally used to ensure a KO.

Have fun everyone!


Card change: Millenniumon DATA

Card Change—Millenniumon DATA is ridiculous!

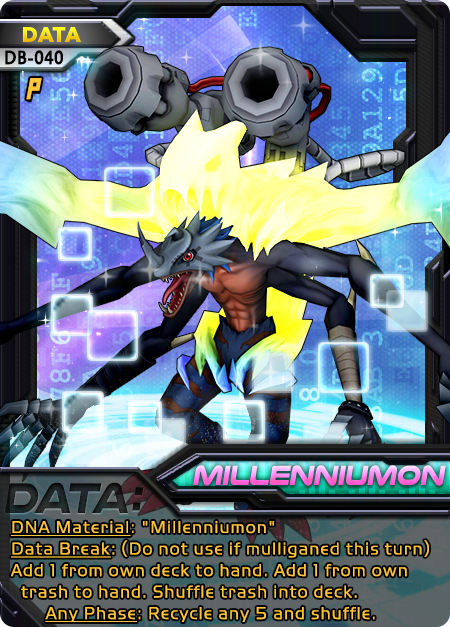
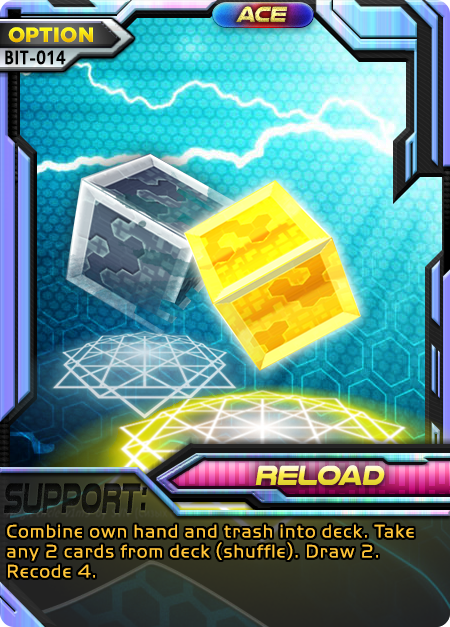
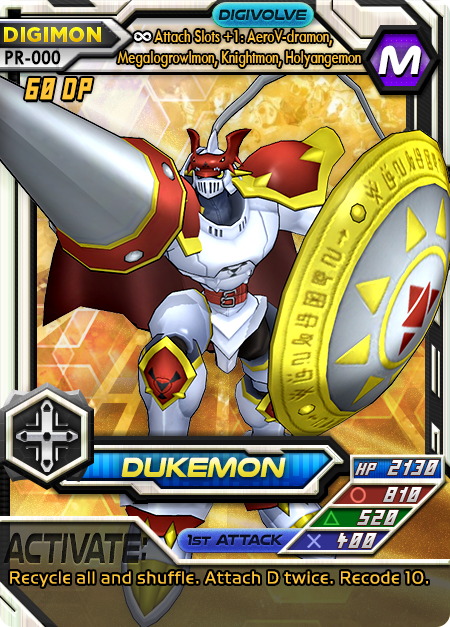
It’s time this one had a wee bit of an update. Millenniumon’s DATA card has been heavily contentious since its release (and before its release frankly). There’s an obvious bug that needed plugged with this little blighter for quite a while. Thanks to user Darkness for motivating me to finally solve the problem :)

The bug: Mulligan your hand until you get this on turn one. Fetch your ACE, Partner, Firewall or any 2 cards that will allow you to set up. Your mulliganed trash goes back into the deck. Your only sacrifice was evolving to Mega, which may not even be necessary if you grabbed [card img=”https://www.v-mundi.com/wp-content/uploads/2016/08/168-Download.png” name=”Download”] and any Level U.

The fix: Firstly, let’s put a stop to mulligan breakage. Mulligans are intended to be risk-reward, at least for a while until you can get some other cards to replenish the deck (provided this is your style). A clause was inserted that you (Do not use if you mulligan this turn). Following that, we double down on restrictions by forcing a player to pick 1 from the trash and 1 from the deck. The whole idea behind shuffling the trash back in before picking was to allow seamless picking from either zone. In this case, we’ll restrict access to the cards you want so that you have to wait till mid/late game if you want to get two nice cards for the price of a data-break.

The future: Going forward, will this fix the inherent problem? It’s difficult to say. Searching effects are always very powerful in any strategy game. It’s appropriately costed as long as a perfect early play isn’t possible with that cost (no late-cost is ever enough to equal a perfect early opening in any game). One possible existing exploit is to use repeated mulligan to get this card again, then wait one round to activate it and do something similar to what you would before the fix. Maybe not exactly the same, since you won’t have access to 2 from the deck and therefore how much you mulligan actually matters (notably, if this card is later in your deck, you’re punished less in this case). However, it can’t be denied that this will hamstring powerful opens such as Download+Ultimate, Partner, ACE, and so on. More to the point: this will give an opponent a turn to respond. One of the picks is now visible from the trash and therefore can be anticipated. Plus, they can now aggressively mulligan for their blocking/counter play. Only time can tell if this will be enough to curb the madness of Millenniumon.

If you have anything to add, don’t hesitate to reach out and leave a comment!

For those of you who use Tabletop Simulator: the module will not immediately be updated, so please use this post as reference material until then.

Auxiliary Set A Release

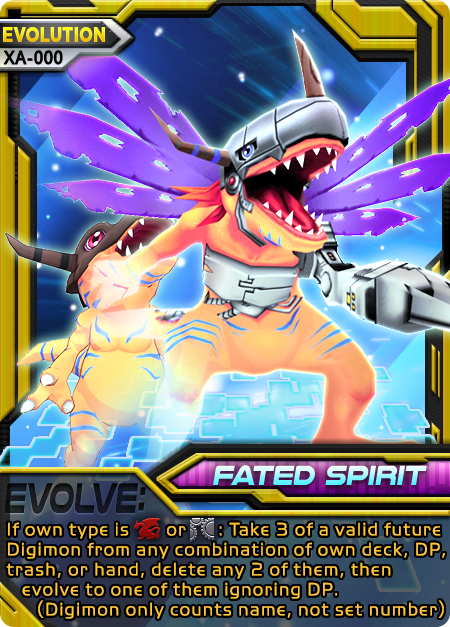
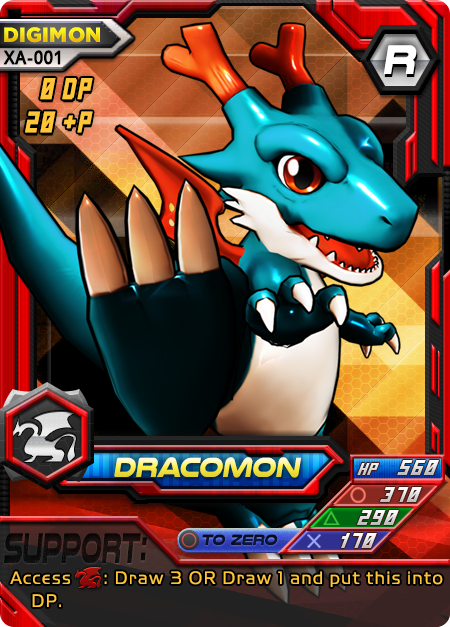
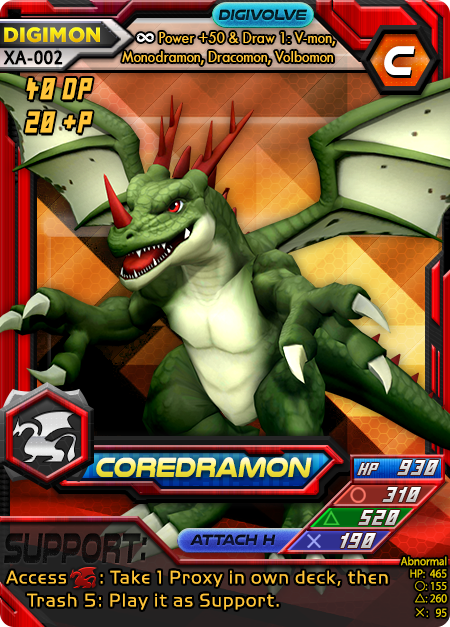
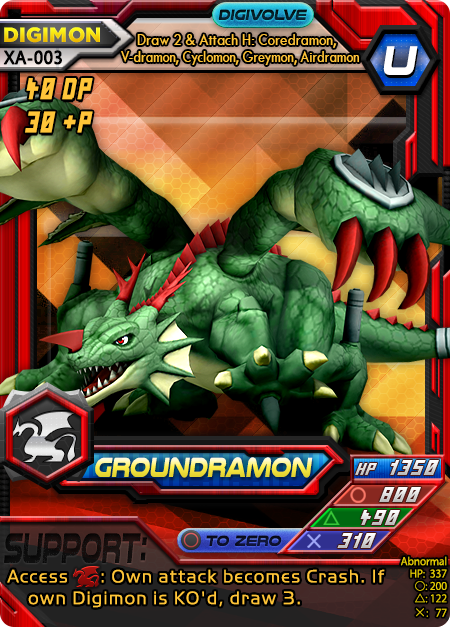
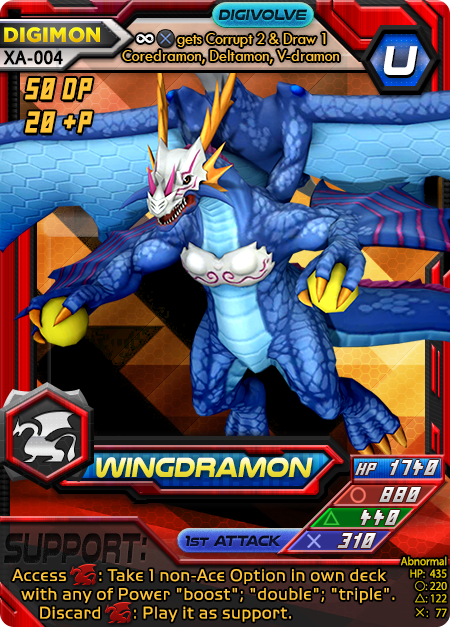
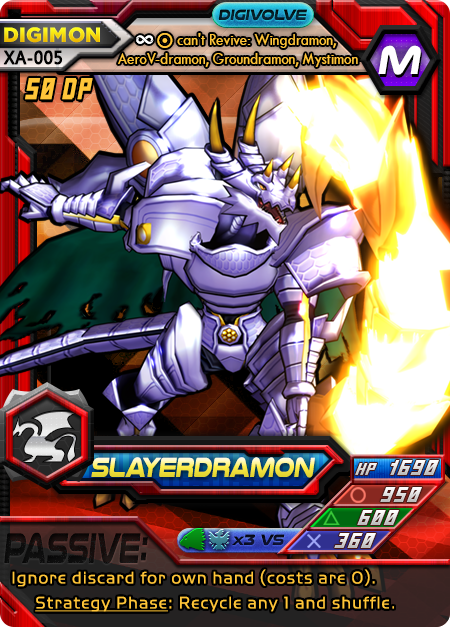
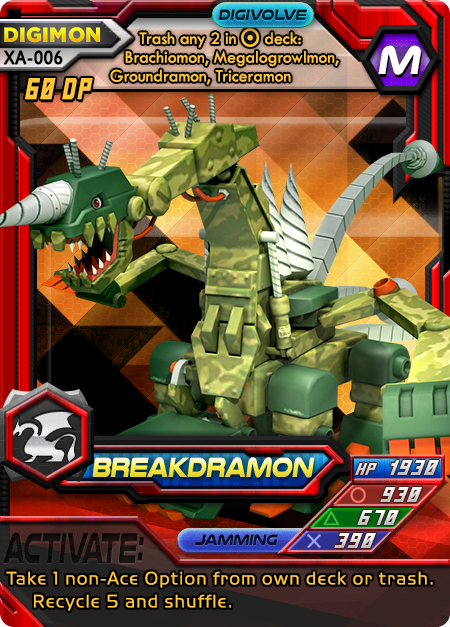
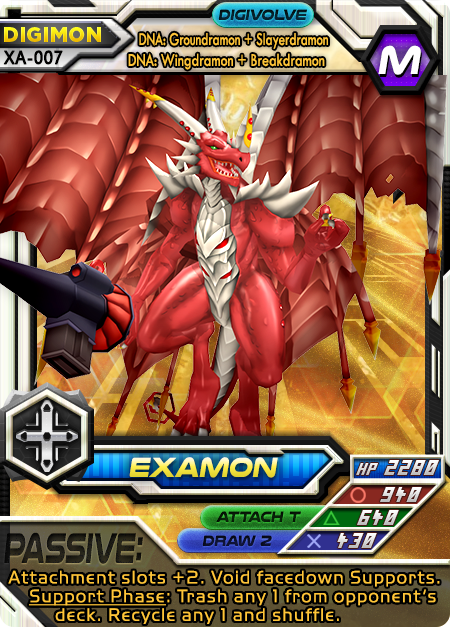
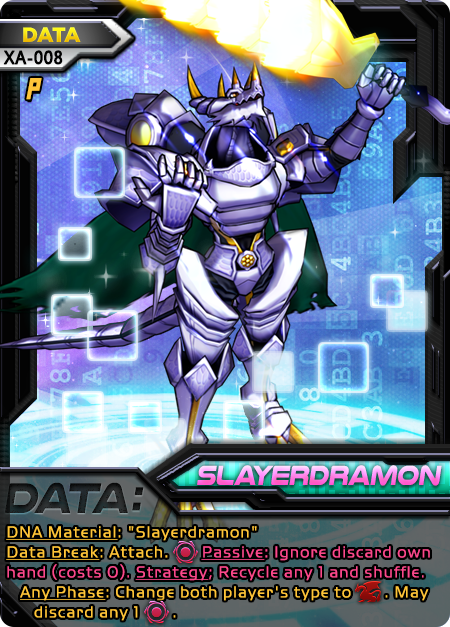
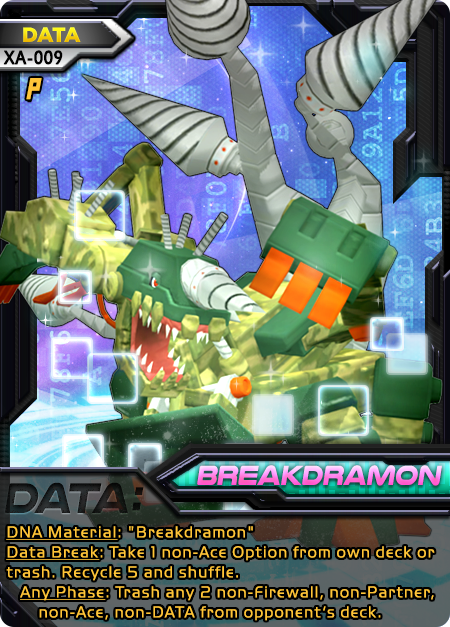
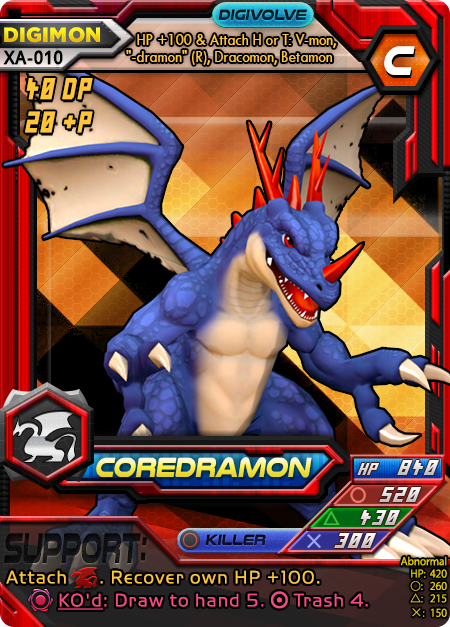
The first of the small, approximately 10-card supplementary sets is here: Auxiliary Set A (or XA for short). This symbolizes a switch to a smaller set format so that I can actually release these as a solo creator more rapidly without having to make massive, difficult-to-playtest, sets every year or so. The intent is also to theme them around some central idea. This set’s theme: Dracomon! You’re getting reprints of Dracomon, Coredramon (bringing the total to 3), Groundramon, Wingdramon, and Examon. There are also 2 new DATA, a new Evolution, and 2 new Megas that were sorely needed. The gallery has been updated with these cards too.

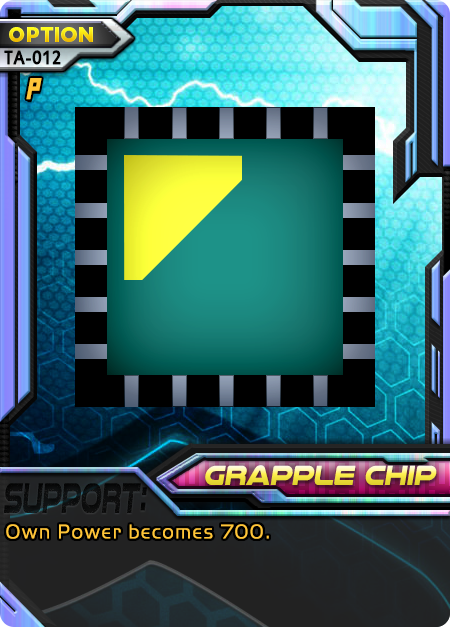
You may notice the new Attachment icon in XA-008. Pay attention to that because it will be how attachments are handled going forward! Anything after that icon in the magenta text is the ability given once it’s in an attachment slot. It may also be used going forward for other purposes such as “Trash 1 [attachment]”. Cards with that icon in their text will be considered “attachment” cards, much like how Ace and Firewall keywords are used to identify those types of cards. For now, there are no plans to retroactively change every card that attaches in the game but I’m trying this out as the new patter going forward. The rules have been updated to include the new icon’s definition. It may take some time for me to update the site’s icon font so it can be displayed.

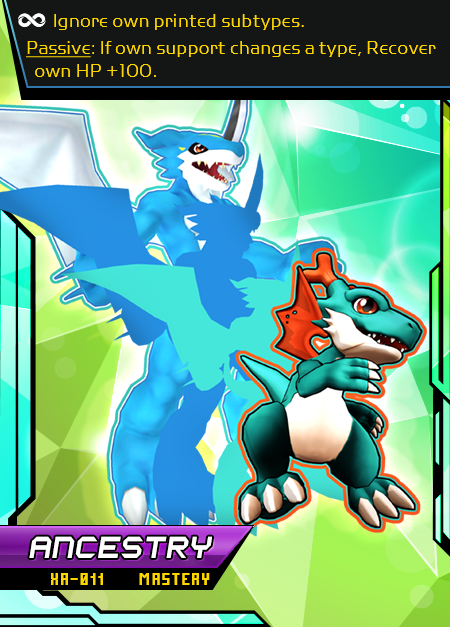
Update Jan 2021: XA had another 2 cards added, Coredramon blue and a Ancestry mastery. These were not fully tested when XA was originally released but thought it was best kept with the original set.

Digi-Deck: Jade Library


Most decks try to pick a specific focus and exploit it to its maximum, maybe tossing in some cards that shore up weaknesses. In the Jade Library, you will instead find a catalogue of toys for almost any situation right at your fingertips. By relying on the extreme speed and respectable draw in Jungle, this deck can load the trash with useful Digimon supports and load the active zone with a powerful ultimate in no time. This is a toolbox of the brute force variety and is incredibly dauntless—most of the deck’s effects revolve around preventing the opponent from affecting it.

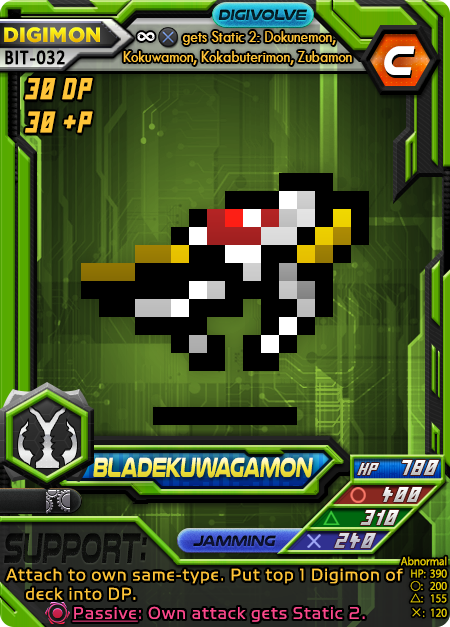
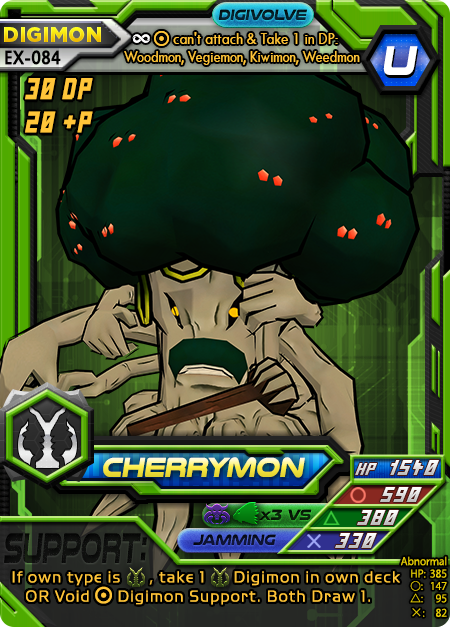
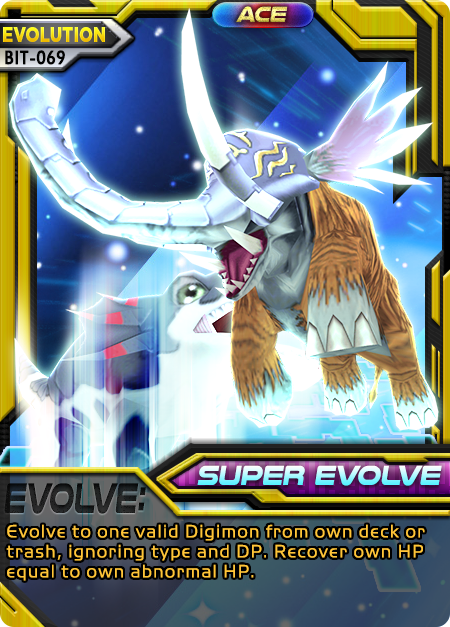
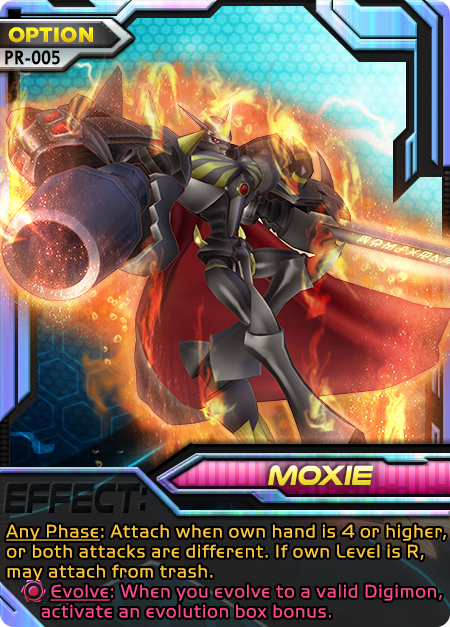
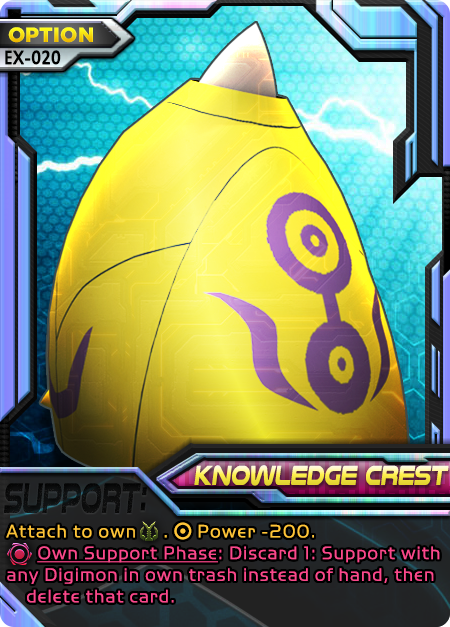
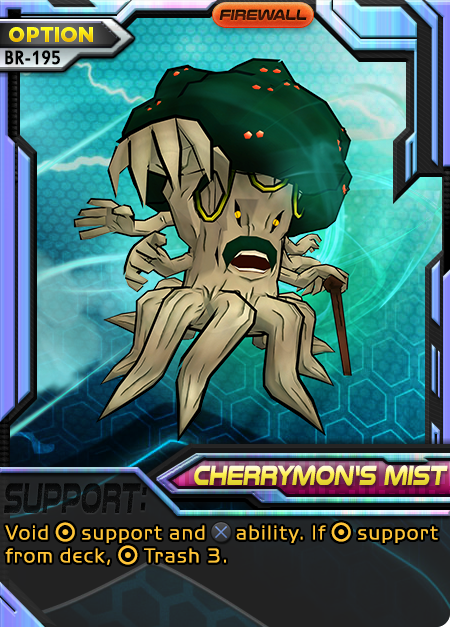
For high skill players, this deck is packed with ways to take advantage of specific situations and force edge cases when brute force isn’t enough. Cherrymon, Knowledge Crest, and Super Evolve are built-in toolboxes. Much of the rest of the deck is dedicated to drawing cards, power gain, racking DP, or exploiting evo-bonuses multiple times. Bladekuwagamon, Vegiemon, Moxie, and Knowledge Crest are all valid attachments; so more experienced players should take note of when they might have to free up a future attachment slot to pivot their strategy.

Types

Primary type: (30)
Rare types: (2) | Lesser types: (1)
Entirely weak to Jungle x3 VS, with extremely rare other weaknesses.

Suggested pre-setup side choices:

Prioritize removing these particular cards in the pre-setup. Adjust to your matchup.

  • Behemoth
  • Silver ball
  • Mega Disk
  • Metal Parts
  • Vending Machine
  • Disrupt Ray

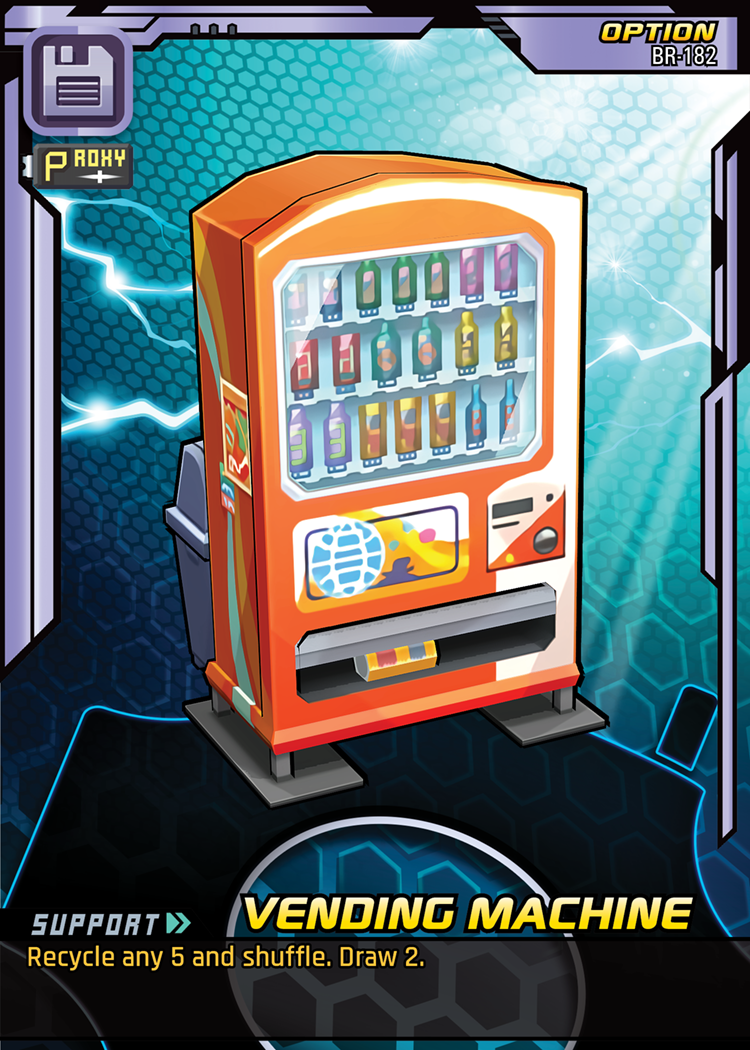
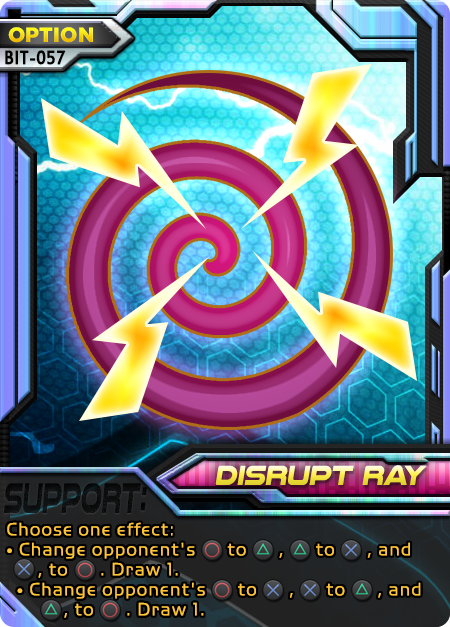
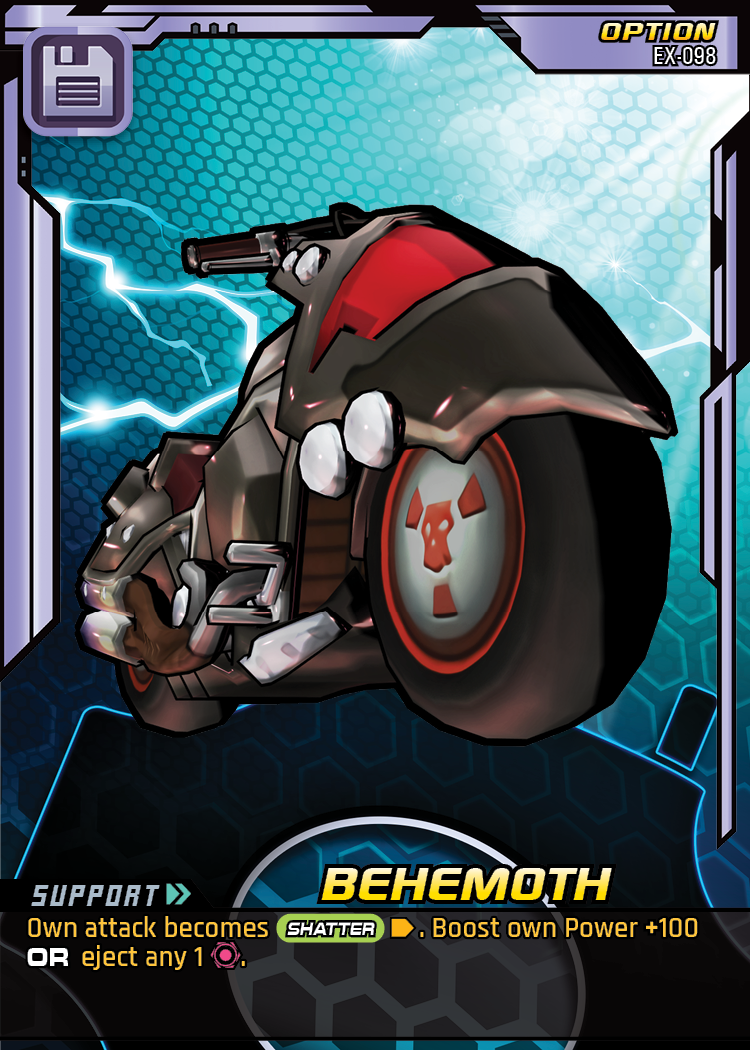
This pre-setup removal will prioritize saving blow-out cards for later game. A more offensively focused pre-setup might remove 3 Cherrymon’s Mist and keep Behemoth, Metal Parts, and Disrupt Ray instead. This could allow for some early KOs in critical matchups.


See visual list for specific card versions whenever ambiguous.

Jade Library

Level R: 11

4 Mushroomon – Great support which heals and racks DP. Used for many of the champion evo-bonuses.

4 Lalamon – Uniquely powerful support which may double high-damage attacks or Drain attacks for more defense. Has +30P and activates crucial evo-bonuses.

2 Palmon – Primarily used for a few evo-bonuses and as a backup +30P rack. Occasionally useful support when an opponent manages to get ahead.

1 Dokunemon Partner – This is our partner. The innate support can be used excellently with all the Drain in this deck as well as the Mega’s 1st Attack, plus it draws a card.


Level C: 12

3 Sunflowmon – Primary beater at this level. This deck mostly caters to diversity over consistency, so it’s important to note that this is used at 3 copies. It has incredible HP, nearly on par with Whamon. Its support has type-fixing and gives 1st Attack. Finally, Sunflowmon can give +30P rack, which is necessary.

2 Bladekuwagamon – The attachment is incredibly useful for stopping recursion decks (like this one). This also sports Jamming and +30P.

1 J-Mojyamon – One of a long line of evo-bonuses that draw cards. In this case, you get 1 from the top 3, which is very high quality; sometimes enough to stop you from wanting to mulligan. Its own support is incredibly useful since it  doubles Cross, which is often Drain.

1 Vegiemon – Primarily in the deck for its attachment since the body isn’t amazing nor is the Shatter. This is a great combo with all of the first waves of Digimon support effects before you attach a Knowledge Crest and begin re-using them.

1 Igamon – The evo-box gets any Digimon in the trash, allowing for premature re-use. In addition, it sports some of the deck’s rare 1st Attack. Generally, this deck’s HP will be higher due to the heavy amount of healing, so the support should give Jamming and rack DP very often. This effectively increases the deck’s void count by one.

1 Togemon – Extra strong cross with drain that can be used to make the opponent think we’re threatening their circle by signalling a triangle-to-zero (we can, Blossomon’s support) but we can also force the triangle with Disrupt Ray. 270 Drain while taking no damage and losing no cards is a solid play. Use the +30P and the support to use a powerful Drain on any attack.

1 Dokugumon – A very useful body for the active zone with power of Dragons, HP of some Marines, a deadly-attack protective cross ability, and an immense amount of disruption effects. Corrupt 1 is strong enough, but the evo-bonus adds trashing and static to its arsenal of BS. Since its circle is so high, an opponent has to add another layer of prediction onto whether it prefers to hit hard or dial back to triangle with corrupt 1 then trash 2 (a high-quality trash). If you do use the triangle, they suddenly have to ask themselves if you’d prefer to take the static 2 on cross anyway, regardless of the circle-to-zero, which could change their attack selection away from the heavily damaging circle. As a support, it’s a slightly weaker Lucky Mushroom which helps with adding even more heal to the deck.

1 Kabuterimon – Very good body but is primarily used for the Any Phase snipe ability to get a surprise KO. This is also usable with Knowledge Crest since the timing will apply to Support as well, therefore it’s possible to deal 100 damage from the hand, regain it using some other method (such as Igamon evo-bonus), deal another 100, then support with it from Knowledge Crest for a total of 300 damage before the battle phase. The potential of Kabuterimon in a deck with a lot of re-use is pretty heavy. Plus it has a big stompy body like Dokugumon.


Level U: 7

3 Cherrymon – Generally used for its support to grab a Champion or Ultimate from the deck which is necessary for the moment. It has a rather weak body but packs some type-hate and Jamming, which should free up your supports to do things other than void—which its support can also do. Its evo-bonus will screw anyone trying a similar strategy to yours, by stopping attach; and it also fuels your hand machine with take 1 in DP before it’s discarded to evolution.

2 Blossomon – Support has good protection or some power gain, which can be especially useful for all of the Drain in the deck. Its own body is respectable but with an incredibly high 300 Drain. Coupled with much of the power boosting (especially doubling) effects in this deck, that Drain should be able to negate ultimate-level deadly attacks at times.

2 Atlaskabuterimon – Primarily used for the void, cheap evolution cost, and name for Herc’s evo-bonus. Can be a good ultimate in a pinch. Atlas’ void is one of the most powerful Digimon sourced voids in the game, acting like a Firewall that merely makes your attack weaker for a turn.


Evolution: 5

2 Plug-In A – Since this deck often uses evo-bonuses but not always, and each bonus tends to be draw-related, it makes sense to include a way to activate all of them or even double-activate some. This is especially useful with Cherrymon, Igamon or J-Mojyamon. The added bonus of discarding an opponent’s DP when combined with the speed of this deck makes the opponent trip hard and can stick them on Champion for several turns while you ascend to Mega quickly.

2 Masquerade – Try to save this for Herculeskabuterimon’s draw 2 if possible by changing a non-Atlas to Atlas. If you’re dry on DP and have Atlas in hand, change their name to Ookuwamon and DNA to Hercules. The trash 2 effect is a minor bonus this deck doesn’t use much.

1 Super Evolve ACE Pick any ultimate from the deck for the current situation. Often used to get Blossomon in general. Atlaskabuterimon is worthwhile when you don’t have a Masquerade for Blossomon so it can activate Hercules’ evo-box. Cherrymon can be a useful option to jam each turn and stop attaches or when facing against Nightmare or Nature opponents.


Option: 11

3 Cherrymon’s Mist FIREWALL – Solid firewall that’s never bad. This gives the deck the maximum void-for-value and can protect from pesky cross abilities. Stay aware that it can be used for the end-turn of the game to guarantee a sure-KO.

1 Knowledge Crest – Used to re-support with all your existing Digimon that (hopefully) have already been used to their maximum potential, as well as catching the few that were used to rack DP. The power reduction acts as protection for that turn so you aren’t completely throwing the battle for a utility.

1 Moxie – This attachment should be placed early and often to make the most out of its evo-box granting powers. Especially devastating when combined with Plug-In A.

1 Mega Disk – Try to wait until either a Vending Machine is in hand or your active is Mega, so that Mega Disk has no cost. At that point, it can be re-used multiple times if properly set up.

1 Silver Ball – Nearly staple leveler of playing fields.

1 Behemoth – Behemoth is incredibly defensive when combining Shatter with Drain and the bonus power. Multiple Digimon in this deck can negate a whole attack from an ultimate-level base attack. With 1st Attack, it may be tough to get a KO due to the weaker bodies (until Mega) but still worth keeping as sleeper hit due to much of the power boosting effects that can be played in the turns before this. Especially useful with shatter for removing opposing Magic Word so your Digimon supports stop being voided.

1 Metal Parts – This is a devastating card. In a deck like this where the hand size is rarely below 4 before its played, Metal Parts should be giving quad or even quint damage in most cases. When combined with a lot of the healing, you should be free to play this on the opponent’s turn and draw 1. It’s possible to have 1200+ Drain with this card, allowing a one-shot of most Digimon and recovering so much health that it becomes daunting to attempt to KO. Given that this deck draws constantly, recovering that loss would be trivial.

1 Disrupt Ray – Very useful (if correctly predicted) for forcing the use of Cross to ensure the safety of your own Digimon, especially if combined with Drain or Jamming. This could effectively read “lose a turn” for opponents in some situations. At Mega level, it turns into a guard against opponents using Cross to stop Herc’s huge Circle or guarantees his 1st Attack final KO.

1 Vending Machine – This should be a given due to the mechanics of this deck. Vending Machine will recycle cards that hit the trash too early such as Knowledge Crest plus re-use killer cards like Mega Disk, Behemoth, Metal Parts, Firewalls, Super Evolve, and Digimon with key supports you don’t want to delete with the Crest. Try to avoid removing Moxie since it can come back on its own. Vending Machine has the double use of making your deck larger than the opponents for when Herc hits the active zone and needs his passive to be live.

Destiny Zone

Partner: Dokunemon

Herculeskabuterimon – This is an earth-shatteringly powerful Mega Digimon. Herc has incredibly high power, ridiculous HP, a draw 2 evo-bonus, and a passive that makes him a dauntless god much like his namesake. Normally, the 70 cost would be a problem but in this deck, that should be trivial with the extra racks, evolution cards, and +30P abounding. Once your deck is larger, try using Mega Disk since it will trash 0. At the point you reach Herc, have a plan to pump the 1st Attack if the math works out such that it could KO on your opponent’s turn. This will net you a bonus or potentially win the game. Since your hand, supports, and deck become sacred, Herc can power through late game like a blowtorch through butter.

Morishellmon – Almost always the primary partner evolution due to the Drain and draw.

Dokugumon – Very useful partner evolution for the superior body (in all regards).

Matrix Evolve Proxy – Since this is a proxy, you will always get the DP -20 discount, even when evolving to Mega. This essentially allows for picking any Digimon to evolve to from the top 7 in a deck with a plethora of singleton champions and several ultimate choices. If none are appealing, there’s a 90% chance that you can simply rack +30 P with it, stack with the -20DP discount, and therefore have 50DP covered to evolve from hand. As a bonus, Matrix sends the partner back to the deck for later use.

Possible Changes

No deck is perfect or unbeatable. Most probably have room for improvement even when not considering the meta. This will be no different. Here’s a list of stuff that just may not work as well as I think it does, that I can see coming:

Disrupt Ray – Mostly a meta-call. It can be useful in some matchups and fall flat in others, not to mention how it takes a lot of skill to use effectively. Suggested replacements: Incubator for attachment toolboxing, Plug-In Backup for more recycle, Burst Growth to exploit early draw, Mega Disk for a second chance with Herc’s trash cost reduction.

Bladekuwagamon – The static and attachment can fall flat in some matchups. Generally, it’s useful to stop the bulk of recursion decks out there but if you’re not sold, I suggest: Woodmon for a balanced support and type-hate, or Flymon for those that rely more heavily on Cross.

Dokugumon (Destiny Zone) – It seems like the best partner evolution until you’re actually playing and Morishellmon always looks more tantalizing due to the similar body but with drain. If you find Dokugumon lackluster or don’t get use out of its disruption, try Yanmamon. It’s a huge hit on power but you already have Morishellmon and Yanmamon can disrupt far more effectively by changing some opponent’s type to anything and then Jam them until you get to ultimate.

Palmon – In case you don’t value covering every single base on Sunflowmon as much as having a support that’s more live, try: Tentomon (DB-015) which has voiding, Fanbeemon which has good protection, or Alraumon if you want to stick with Drain but more consistently.


Destiny Zone


Key Points

Jade Library is heavily reliant on churning through the deck both to evolve quickly and set up the trash for future play. Keep the following in mind while playing:

  • Breakneck evo-speed. This deck has some of the fastest evolution without level-skip in the game, allowing you to make maximum use of HP to stall and get to Mega while dishing damage along the way.
  • Above-average endurance. Despite the low base-HP on many Digimon (except Mega), this deck contains a lot of Drain and Recovery. It’s possible the endurance is even higher, especially if prioritized when using search effects.
  • Wellspring of draw. Most evo-bonuses have draw and the deck quickly gets into situations where it can draw 1-2 extra per turn.
  • High level of void. The deck natively contains 9 cards that void but can search and re-use them ludicrously.
  • Great consistency. The re-use of Digimon supports plus recycling combined with the singleton nature of many of its cards allows the deck to wear many hats, often times at-will.
  • Below average power. Like with most Jungle decks, until Level M, the deck suffers tremendously on attack power. Its relative power is higher early due to the fast evolutions, but the equal-level power falls hard. This can be mitigated with much of the power-increasing support but the base damage is low enough and priority is typically on defense enough that it tends not to be effective until Ultimate or Mega.
  • Attachment hell. Unlike many decks with attachments, this one can be hell at times. If attachments are drawn in the wrong order (such as Knowledge Crest early or Vegiemon late), it can bring the efficacy of the whole deck down. Try to mitigate this with recycle when they hit the trash or simply take mulligans on the good faith that you’ll still get to evolve with any hand (which fuels Knowledge Crest anyway).
  • Vulnerable to Static. While not a terribly common effect, the deck does rely on trash placement enough that static can be a bummer to face.


This particular deck tested very well versus just about any matchup despite some of its weaknesses. The primary reason was due to its undaunted nature: you can void almost any problem support and prevent the brunt of devastating attacks while quickly trucking on to Mega level. In all of the time I’ve played this deck, Herculeskabuterimon has rarely been KO’d and even so, I tended to only need 1 more KO myself in a deck with a ton of defense and speed, so I could often grind the game down until I was at an advantage again. This is a tough deck to actually stop, even against something specifically packing DP-removal, anti-Level U/M cards to the brim, and copious static—all of which should be its bane. That said, it has a hard time making the hits up to mega count since they tend to be pretty weak. Decks with low endurance tend to survive and make it to Ultimate or Mega themselves, meaning Herc often has to contend with an opponent’s strongest Digimon. This tends to suit Jade Library just fine as it’s equipped with an incredible body at Mega and some nasty supports for dealing with opposing Megas, which therefore tend to be 2 easy KOs.

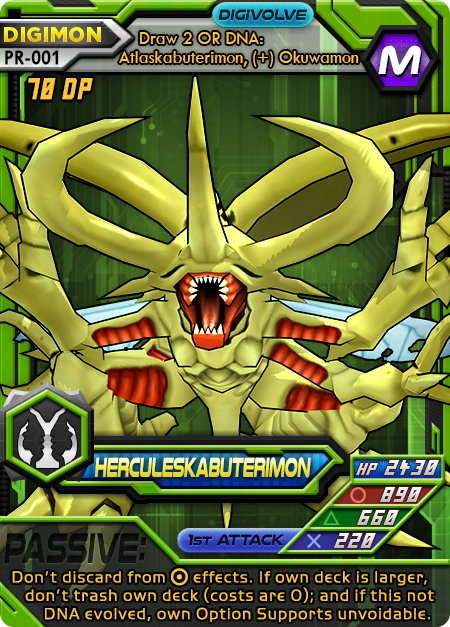
Watch out for the following Megas, which can actually rival Herc directly:

  • Boltmon: Jungle x3 VS = 1500 Triangle, huge HP
  • Moonmillenniumon: Huge HP and can stop all Herc’s best attacks, can’t be void, can search an Ace
  • Zeedmillenniumon: Huge HP, can’t be void, search any 2 cards to deal with you
  • Omegamon: Attachment and power superiority, nearly strictly better version of Herc’s passive
  • Examon (BR): High power, can charge up DP then DNA for an activate so powerful it one-shots
  • Millenniumon, Diablomon, Hi-Andromon: Each can Crash for a one-shot. Otherwise superior power and very high HP.

Despite the number of contenders at Mega, most of the rest have to work very hard and it’s peerless against Ultimates. If speed, a toolbox, consistency, high draw power, and a very powerful Mega sound appealing to you, give Jade Library a try.

Top

Digi-Deck: Magna Dux


Do you really like having a near-unlimited use of powerful trash cost cards like Mega Chip? Do you like to stack flat power gain with multipliers? Does the idea of tying all these benefits together appeal to you? Then you just might be ready for Magna Dux. This is a deck primarily centered around “early and often” with regards to everything. Get big effects early, get them often, don’t stop getting them. It relies on its Ace Reload and its Mega Dukemon to recover any costs paid. Lastly, it stacks attachments with the copious toolboxing to make each active more than meets the eye.

For high skill players, this deck has multiple layers of consideration: what to toolbox when, how aggressively to mulligan for a type-hate champion, or keeping track of deck size are all important. Mostly, it’s a deck for those who prefer to hit one button (Cross) and keep hitting it for most of the game.

Types

Primary type: (25)
Lesser types: (2) | Lesser types: (3)
Rare types: (1) | (1)
Mostly weak to Wind x3 VS, but several additional weaknesses occasionally.

Suggested pre-setup side choices:

Prioritize removing these particular cards in the pre-setup. Adjust to your matchup.

  • Mega Chip
  • Silver ball
  • Mega Disk
  • Dark Wings
  • Reload
  • Cherrymon’s Mist

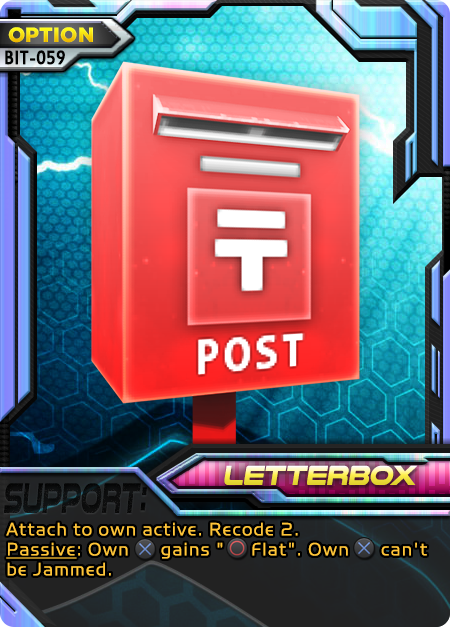
This pre-setup removal will prioritize getting as much early-game as possible and minimizing late game. In some cases, early Mist could be better than protecting your Cross with Letterbox, so make adjustments where needed.


See visual list for specific card versions whenever ambiguous.

Magna Dux

Level R: 11

4 Patamon – Primarily fills the +30P quota while giving an extra set of type-hate cards. In this case, as a hate it’s better than Attack Chip and Behemoth combined. However, it will always be useful for recouping deck losses.

2 Penguinmon – Another Rookie primarily used for the +30P, but also doubles as a +20P that gives an evo-bonus. If you rack anything in this deck and play Penguinmon, you should be able to make any non-Ruler evolution. The extra evo-bonuses aren’t incredibly necessary, so save them for Angemon, sometimes Cupidmon, and the rare V-dramon.

4 Lucemon – This is the primary Rookie body of the deck. The +20P will rarely be good enough to do more than assist Evolution cards. However, the type-hate cross is sometimes a safe bet to fall back on, it has an evo-bonus to both Angemon and Cupidmon. The Support ability is like having 4 sources of keeping your superior bodies alive versus Digimon supports, since it voids them. That void is unconditional (save for being Digimon) but beware of the draw 1 to the opponent. If played perfectly, it should void something scary and put the opponent from 2 to 3 cards, which gives them zero advantage on their own next turn.

1 Kudamon Partner – This is our partner. Its innate attachment effect is part of the main purpose of Dukemon (to have two attachments) and works well with the deck.


Level C: 10

4 Angemon – Good HP body, mildly respectable power all-around, and a terrifying Drain attack. When evolving from the majority of the deck’s Rookies, Nightmare and Marine suddenly take a nosedive and eat triple damage plus your Drain! This is devastating if used correctly. The Support is useful to extend your field of type-hate beyond whatever the current active may be able to target. The if not will keep us healthy regardless what the opponent is packing.

4 Cupidmon – Good HP, useful power levels, and respectable early 1st Attack. Its support may boost power like much of the deck—comboing with the power tripling effects, or it may give Crash which is very effective given that this deck has above-average HP. The if not will keep us healthy regardless of the opponent’s level.

1 Kokatorimon – This card provides valuable engine-fuel by itself. As long as you don’t lose the active, it should start adding quality to the deck almost immediately. Unlike most decks with Kokatorimon, this does not entirely rely on him but instead allows the deck to extend its number of useful attachments by one (for Dukemon) and sets up early re-use of key cards for later.

1 V-dramon (PR) – This champion’s immense body for both HP and circle power make it a useful singleton card and it doesn’t disrupt Magnamon. The Crash has the added benefit of taking advantage of the deck’s sizable HP. Its support is often a life saver in any conditions.


Level U: 6

4 HolyAngemon – (Magna in dub, hence “Magna Dux”) This is the primary evolution target and the most effective way to jump to Dukemon. Given its average stats, the best way to make use of HolyAngemon is by adding an attachment (such as Love Crest), gaining the evo-bonus which is nearly guaranteed, and supporting such that his cross is incredibly powerful. This can easily one-shot 98% of the game’s champions and has a faster damage clock than any ultimate without pulling tricks. Given that you should have 3 common type coverages for the type-hate, the only remaining thing to do would be to support with another HolyAngemon for 6 types, or Patamon for 4. Therefore it is crucial that all copies of HolyAngemon are recycled back into the deck either with Reload, Patamon, or Kokatorimon.

2 Magnamon – Often times HolyAngemon isn’t strong enough to carry you to Dukemon. For these cases, Magnamon sports a significantly higher HP and Power body, albeit at a significantly increased cost. Given that you will get a free attachment due to the Ruler restriction the deck was built around, its key that if you want to evolve to Magnamon, try playing cards that trash as a cost first such as Giga Hand, Mega Chip, Mega Disk, or the other Magnamon support. These are also great targets for Kokatorimon recycling due to the Firewall-like void support. Generally if playing against most decks, HolyAngemon will have a strictly more powerful (and harder to stop) attack power. In those cases where he’s not your best bet, make sure to try and play your draw effects and get Magnamon.


Evolution: 5

2 Super Tag – Unlike a Digivice or similar, Super Tag can be used to virtually reduce the cost of a Level M’s DP.

2 Incubator – You or the opponent will likely have an attach so this is used for the DP reduction at Level M while riding the winds of past attach success. Especially useful for getting rid of Magic Word (from either player) so you can immediately get evo-bonuses again. Crucial for finding attaches early. With Magnamon’s attach T evo-bonus, you can also choose from the trash, which gives full coverage for any attach. Reminder: you cannot pick firewalls or aces with Magnamon BUT Incubator can pick Magic Word if you want!

1 Burst Growth – Incredibly useful at recovering losses due to some of the more expensive evolution in this deck.


Option: 14

2 Attack Chip – Very basic and useful card. Combo with x3 VS on Cross attacks, increase the threshold for a 1st Attack KO, and significantly increase Drain’s effectiveness.

1 Mega Chip – The trash cost in this deck might as well be unlimited due to Dukemon’s ACTIVATE and Reload. This becomes an absolutely bananas Power boost and makes numbers large enough with x3 VS that it might kill MoonMillenniummon in one hit under the right circumstances.

1 Mega Disk – Same as Mega Chip for purpose and near-unlimited use, but instead used as a way to keep a key active such as Angemon or HolyAngemon in case it would die.

1 Silver Ball – Nearly staple leveler of playing fields.

1 Behemoth – With the x3 VS in this deck, 1st Attack and +100 Power can be just plain nasty. With Shatter, most of the Circle attacks are high enough that this can completely nullify an opposing attack.

1 Puppet Switch – While the type-change effect isn’t too useful, the +10P combines nicely with the +30P racks in the deck and the recycle + draw allows the immediate reuse of Reload for a potential infinity engine. Play Reload, choose Puppet Switch and any other card, play Puppet Switch on the next support to get Reload, use the racked Puppet Switch somehow to get it into trash, play the Reload putting Puppet Switch into deck, get the Switch again. Reload as much as necessary.

1 Love Crest – Semi-useful evo-bonus effect in some cases, especially if one is missed such as Dukemon. The attack swap ability is incredibly useful in this deck since it makes triangle very powerful when Cross isn’t as devastating.

1 Letterbox – Given how reliant the deck can be on Cross at times, it’s useful to have it unaffected by Jamming. In many cases, this turns your type-hate attacks into attacks that also threaten to Flatten. With that constant threat, letterbox brings a new dimension (no pun intended) to the deck’s ability to add pressure to each attack. Often it will cause your Cross attacks to be able to kill either by flat or HP damage, so the opponent can’t always simply invalidate only one of those.

1 Cherrymon’s Mist FIREWALL – Used specifically for the end-turn of the game to guarantee a sure-KO. Otherwise, it can be selectively recycled by Kokatorimon for later or recycled with Reload.

1 Magic Word FIREWALL – Given the high impact of attachments in this deck, Magic Word is incredibly useful. In fact, it’s almost unfair since most of your attacks during a given game should be Cross, making Magic Word a voiding machine. Be careful since you can’t activate evo-bonuses (even if a card effect would) while it’s attached and that can prevent Angemon/HolyAngemon from being as useful. This can also outright diminish Dukemon’s purpose in the late game.

1 Ultimate Storm FIREWALL – People get very addicted to circle versus this deck. It has virtually no way to punish circle other than flat and deadly attacks will significantly dampen all the Drain. This is best used when you can’t 1st Attack for a KO.

1 Giga Hand – Given the nearly-unlimited trashing in this deck, Giga Hand is nearly a copy of the ACE Ground. This is especially useful in a deck where HP is above average like this.

1 Reload  ACE – Given the number of reckless trash costs in the deck, Reload seems like the natural choice. The recycle all feature works much like Dukemon and being able to take any 2 cards after (plus extra) in a deck with multiple single-copy cards means you have a lot of choices for exactly what is most devastating. Here you can see the particulars of why there’s so much type-hate in the deck: choose any type-hate necessary to win or simply pick a Cherrymon’s Mist if it can win the game! With Reload not deleting itself after use, it can then be recycled back into the deck and used over and over, making this a counter to trash-centric decks.

Destiny Zone

Partner: Kudamon

Dukemon – The eventual goal. Usually, you’ll work toward Dukemon slowly even if your pace could be increased. This is because the deck has a lot of HP, healing, and staying power even if it’s often very fast at evolving. That path will allow you to carefully pick your evolution chain and eventually land on Dukemon from HolyAngemon, which is the ideal choice. If not, try to re-use racked DP with Super Tag or wipe out attaches with Incubator and grab a replacement attach (which will let you hold off on the ACTIVATE for a while). He’s absolutely massive in both HP and power all-around, especially his record-shattering 400 1st Attack, which can be pumped very high by supports in this deck. Dukemon’s ACTIVATE is very reminiscent of the Reload ACE: You’ll recycle everything, resetting all the trashing that was done to you, then attach any 2 in the deck. In addition, you get to set up the next 10 cards of the game. By the time Dukemon is necessary, x3 VS may not be a viable solution anymore especially against a skilled opponent. This is where careful choice of which attach combo to pick and how to set up the next 10 cards of the game is important. Be incredibly careful! Dukemon has a crucial evo-bonus, which is shut off by yours and your opponent’s Magic Word. Be absolutely ready to remove yours (with Incubator) and Shatter the opponent’s (with Behemoth) if necessary to make the most of this Mega.

Akatorimon – Usually a way to grab Kokatorimon when absolutely necessary. Not generally recommended unless it’s absolutely vital. Searching for other champions may also be more important than Kokatorimon but I would argue rarely is their Support going to work well enough that Cupidmon wouldn’t have been the better partner evolve choice.

Cupidmon – Good body, has 1st Attack with big cross to rival Dukemon, choose this.

Grapple Chip Proxy – 700 Cross before you even multiply it. With drain.

Possible Changes

No deck is perfect or unbeatable. Most probably have room for improvement even when not considering the meta. This will be no different. Here’s a list of stuff that just may not work as well as I think it does, that I can see coming:

Akatorimon (Destiny Zone) – Useful for fetching some support champions but may not be as effective as Reppamon in many matchups.

Puppet Switch – Some won’t want to focus on cheesing Reload as hard and for those people, I suggest Stardom over Puppet Switch. Or some other attach for ridiculous combos at Dukemon.

Attack Chip – While this is incredibly useful and versatile, I know that many people won’t appreciate such a unitasker. Even in cases where people do, they might otherwise favor Dominate Chip given the evo-speed and HP of the deck. Since Attack chip is here for cross but also circle, a replacement should ideally respect this. However, Grapple Chip and Plug-In S (Special) both amplify Cross to cosmic levels which make them tempting. Boost Chip is awesome for using up the Puppet Switch, especially to keep abusing its loop since one requirement is to get it out of the DP.

Incubator – If you don’t like the redundancy of incubator in an attach-heavy deck, try Splice Chip. You’ll get a guaranteed 10 +P and at least 200 Power, which can wreck with the cross levels here. Be aware it makes Dukemon a harder evolution, which is usually not a problem since you want to go slow anyway.

Letterbox – I wouldn’t blame anyone for being skeptical of using Letterbox in a non-flat deck. It really does work but if you can’t make it sing for you or just don’t like spreading out that far, try Potty Boat to punish partners, Lucky Mushroom since your attacks will likely always be different, or Data Copy in case an opponent tends to have some sort of supremacy over you. For Data Copy, your evo-bonuses will protect you from the type change and you get to keep your Cross abilities.


Destiny Zone

Key Points

This deck is incredibly vitality-based and capable of paying trash costs almost indefinitely. Let’s take a look at some of its strengths and weaknesses, and keep these in mind while playing:

  • Above-average evo speed. Super Tag and Incubator have a habit of making DP costs very low with added benefits, plus 6 copies of +30P cards.
  • Above-average endurance. Hits the mark for HP and keeps going. Combined with its heals, this deck tends to sit at 1000 HP+ for champions and can be 2000 HP+ for ultimates. With proper recursion of Mega Disk, it keeps going.
  • High-to-Bullshit Power. When the typing is right (which is usually), this deck’s power is outright bullshit. Flat power bonuses stack immensely with multipliers which this is abusing heavily. When that fails, it falls back on the completely celestial power ratings of Ruler Digimon.
  • Infinity engine. Reload, Dukemon, and other recycles in this deck tend to make it an infinity gauntlet of useful cards being played over and over. It’s nigh-impossible to beat this with a trash strategy except with numerous well-placed voids (or a Dark Destroy right to the ace, for deletion). Can mulligan incredibly aggressively, especially to cheese a Reload into the hand.
  • Never fails. All of the conditional effects in the deck tend to have “if not…” triggers that give you some other effect anyway. This makes cards capable of multiple roles that shift throughout the game as your standing shifts.
  • Champions can be sticky. Since all the champions cost 40 DP and get no discounts, it’s incredibly difficult to start off on champion immediately without some form of evolution card assistance. This is where Penguinmons, Super Tag, and Incubators combine with the racks to make evolution possible.
  • Vulnerable if Reload gets buried in the trash or deleted. Be wary of trash decks nevertheless since Reload is incredibly necessary to the deck. Once that passes, Dukemon, Patamon (if not) Puppet Switch and Kokatorimon are the only hope to recover it.
  • Magic Word is a soft counter. As said, Dukemon has a hard time with Magic Word on the field. You can remove your own easily enough but you’ll likely have to bait out the opponent’s with a powerful Option.
  • Self-type change can disable the deck. Opponents who use Data Morph, Scummon’s Curse, D-Link in a multi-color deck, or Puppet Switch may prove tough due to their ability to use type changes to evade the brunt of your damage.
  • Often lacks draw power. Despite the singular V-dramon, alternate Patamon supports and misc draw scattered around, the deck does lack a significant source of draw and relies heavily on Reload.


Beside the apparent complexity of Magna Dux is a brutal simplicity—hit hard, hit fast, hit often. Keep hitting, don’t stop. While its copious use of Cross is predictable, it’s often not very punishable. In fact most of this deck’s play style is incredibly predictable but difficult to actually punish. Therefore it’s tough for an opponent to create an edge case to exploit against Magna Dux. With so many layers of redundancy and an ethos of “do what works”, this deck tends to be a dauntless KO-gobbling machine. While not particularly heady or flashy, it does contain some near-infinite combos that can give inspiration to new deck types. If you’re a fan of big, meaty plays that are consistent for days, try Magna Dux.

Top