Digimon COTD

Digimon COTD: Incubator

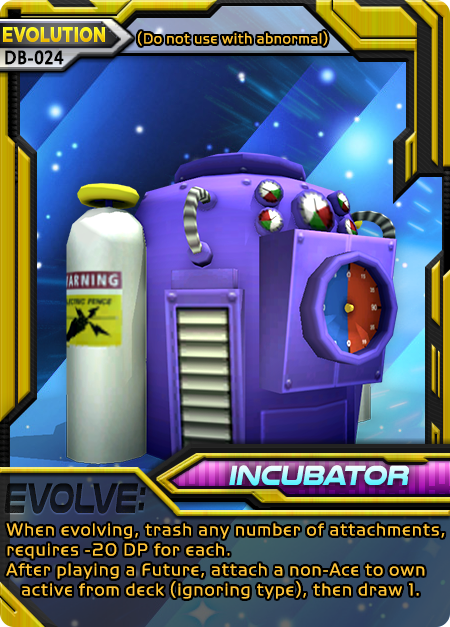
Incubator—An Evolution that attaches a card from your deck while evolving.

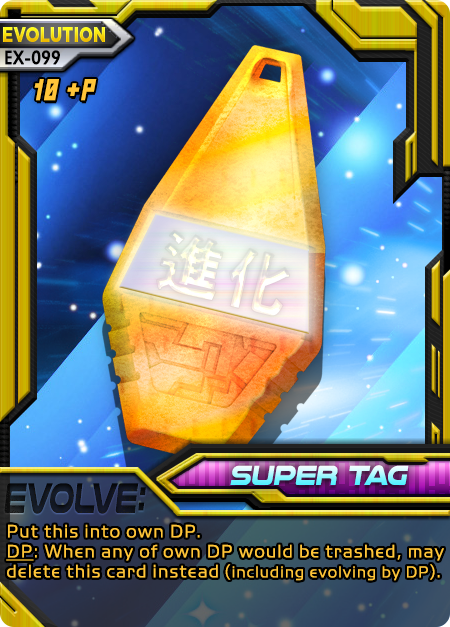
What’s good about it: Incubator lets you set up your newly-evolved Digimon for a much more fruitful lifespan right out of the box. It replaces itself after you use it, with the handy draw 1. Since you’re evolving by DP to use the effect, it also stacks with the effect of Super Tag. This is easily one of the best toolbox cards in the game due Evolutions being nearly unvoidable, and this ignores types. Extremely powerful combos that would normally be forbidden are allowed due to ignoring type, and it’s incredibly consistent since the attach comes from the deck. Unlike most Evolutions, you can use this with Level M and pair it up with a combo attach. If you have any attachments, including if the opponent does, you can trash them for help evolving.

What’s bad about it: Can’t attach Aces. Can’t ignore non-type requirements such as level. This card is an Evolution that gives you no discounts unless you or the opponent already has an attachment. Useless with [card img=”https://www.v-mundi.com/wp-content/uploads/2016/08/066-PurityMask.png” name=”Purity Mask”] or cards like it. You can’t use it on any Digimon that is not actually evolving right then, including abnormals. You won’t get the flash effect when attaching; the one you’d get if you support with the card to attach.

Tips: Be sure to take advantage of its opponent attachment killing, or use with negative attachments like [card img=”https://www.v-mundi.com/wp-content/uploads/2018/05/067-DarkEvolve.png” name=”Dark Evolve”] or Purity Mask. Pair this with the Mastery [card img=”https://www.v-mundi.com/wp-content/uploads/2020/11/004-ToyChest.png” name=”Toy Chest”] for maximum use of its limits and DP cost reduction. Using several different attachments can really help Incubator shine—any of the Crests and [card img=”https://www.v-mundi.com/wp-content/uploads/2016/08/064-Stardom.png” name=”Stardom”] are a good starting point. [card img=”https://www.v-mundi.com/wp-content/uploads/2016/08/099-SuperTag.png” name=”Super Tag”] with this lets you keep your DP with the attach. Remember, look for the words “Attach to…” for cards that don’t have a type. Not just anything can be attached, you know! [card img=”https://www.v-mundi.com/wp-content/uploads/2018/05/05-Moxie.png” name=”Moxie”] and [card img=”https://www.v-mundi.com/wp-content/uploads/2016/08/022-Love-Crest.png” name=”Love Crest”] pairs incredibly well due to the odd wording: “after playing a Future, attach…” which is before you actually evolve—therefore these cards will activate an evo-bonus which may assist with evolution (or double your evo-bonuses). With any “Slots +1″ effect, Incubator sets up attach combos very quickly that are normally impossible, especially if they require different types.

An example is [card img=”https://www.v-mundi.com/wp-content/uploads/2020/11/023-Gorgon.png” name=”Gorgon”] + [card img=”https://www.v-mundi.com/wp-content/uploads/2018/05/040-Flarelizamon.png” name=”Flarelizamon”] to get Cross +100, Circle Grudge, and 1st Attack which can allow you to have an incredibly powerful Grudge that gets both effects (due to you attacking first with double power, plus getting hit after and KO’d for huge revival). Another is using Incubator to attach [card img=”https://www.v-mundi.com/wp-content/uploads/2020/11/000-Clearagumon.png” name=”Clearagumon”], then Support to attach [card img=”https://www.v-mundi.com/wp-content/uploads/2018/05/068-MagicWord.png” name=”Magic Word”]. With this combo, every time both attacks are different, void opponent’s Digimon support, then Static 3. Going even further, combine Slots +1 with evo-bonuses that attach like [card img=”https://www.v-mundi.com/wp-content/uploads/2018/05/037-Orochimon.png” name=”Orochimon”] and [card img=”https://www.v-mundi.com/wp-content/uploads/2020/10/008-Chaosdukemon.png” name=”Chaosdukemon”] for instant-combos! A Level M combo that’s fairly solid is [card img=”https://www.v-mundi.com/wp-content/uploads/2016/08/096-Jijimon.png” name=”Jijimon”] + [card img=”https://www.v-mundi.com/wp-content/uploads/2016/08/017-Purity-Crest.png” name=”Purity Crest”]. When you don’t mulligan, you draw 2 (with no max hand size, and you may have already drawn 2 due to Prep Phase).

Digimon COTD: Gold Treasure

Gold Treasure—An Option that helps get almost any Digimon in own deck.

What’s good about it: Gold Treasure can fetch you a Digimon for evolution; DNA materials; or you can be cheeky and use it to toolbox supports. The card you search just needs to be related to your active somehow, in the evolution “network”. For example: the same-type. A Digimon with your active’s name in its evo-box is also in-network.

What’s bad about it: This card is a utility card—it helps you for the next turn, not this one. It’s not completely unrestricted like [card img=”https://www.v-mundi.com/wp-content/uploads/2018/05/041-Mastertyrannomon.png” name=”Mastertyrannomon”] special evo-box bonus.

Tips: Gold Treasure can let you run a wider variety of Champions and Ultimates in your deck and toolbox them for support and evolution box effects. That’s especially useful for Nature type, since they have very powerful Digimon supports that are situational; so you can just pick whatever is right for the situation. It’s also really helpful for setting up DNA evolution for Ultimates and Megas. For most decks, this might as well say “Take 1 Digimon in own deck”, since the conditions only fail to cover abusable cases. This card has nearly endless use-cases for making combos. One especially useful way to shore up its slow speed weakness is to take a Digimon with an “Any Phase” speed, such as Redotamamon.

Digimon COTD: Chip D

Chip D—pure card manipulation.

What’s good about it: Chip D lets you choose between 3 very powerful effects, or get a second one for the price of 1 discard (the same as playing 2 Chip-D at the same time). Corrupt 5 is beyond the normal limit for wrecking your opponent’s ability to draw effectively. Static 5 gives complete control over decks that love to use their trash as a second resource, or which can recycle cards like its partner, Aces, Firewalls, and other select cards. The “trash any” effect snipes the best 2 cards in the opponent’s deck for that moment, including their partner. “Chip” named cards are supported by [card img=”https://www.v-mundi.com/wp-content/uploads/2017/08/007-Ace-Chip.png” name=”Ace Chip”].

Each of these effects can be combined in devastating ways: Trash any 2 cards, then static them so they’re effectively deleted straight from the deck. Corrupt 5 and then Static 5 to seal any possibilities not on the field already or in the opponent’s immediate hand. Trash any 2 and then corrupt 5 to remove the best possibilities from their deck and make their next mulligan garbage—effectively turning off the mulligan mechanic unless your opponent can take a huge risk (if good cards are in the top 5, it also means you eliminated more than 2 good cards). You can also use the “trash any” effect to reveal the entire contents of the opponent’s deck.

This chip is also a proxy card, so you can pair it with any partner support effect that adds another similar utility option (such as opponent discard), one with opposite-effects that benefit yourself (like recode, recycle, or draw), and arguably the best pairing—battle supports to make up for its lack of usability there. [card img=”https://www.v-mundi.com/wp-content/uploads/2016/08/183-Partner-Finder.png” name=”Partner Finder”] becomes an immensely horrifying combo in that case.

What’s bad about it: This card can’t help in the battle and tends to be used in “win-more” situations (meaning doesn’t help you when you’re behind). Without a discardable card, Chip D is far less effective for what you get. The deck sniping is virtually useless if the opponent’s best cards are already out of their deck. You can’t target their Ace or Firewalls for sniping, which are usually the targets you most desperately want to hit.

Tips: Chip D is the anti-mulligan card. Almost every time you get ahead in KOs (just after a KO), the opponent will mulligan for a partner. Sniping that partner and deleting it after (or sniping + corrupting 5) means that’s not possible, and any other mulligan may also be impossible. I would argue with the idea that Chip D is “win-more” in most situations where you appear ahead. Digimon Battle Evolution allows many comeback moments which can be devastating, but Chip D stops those. Sometimes you can lose a game because you have less KOs but a better position (such as higher level), then you KO the opponent and they mulligan for some killer card and win. This chip will stop such situations by cementing your superior current position, regardless of your KO count. Sealing the deck in more than one way and sealing the available trash gives you a lockdown on the available stuff for the opponent, which makes the game more manageable and come down to what’s in their hand. If you also have a void or two ready to go, the wake of Chip D is a completely sealed game where they must fight your Digimon without tricks. A well-placed [card img=”https://www.v-mundi.com/wp-content/uploads/2018/05/056-Net-Worm.png” name=”Net Worm”] before this card is even more horrifying, since it means most opponent’s hand will go to 0 and then never recover. This can be a heavy advantage-maker when paired with other Corrupt effects, ultimately filtering one or both decks into oblivion. Specifically, [card img=”https://www.v-mundi.com/wp-content/uploads/2016/08/070-Lucky-Banquet.png” name=”Lucky Banquet”] is a huge benefactor of Chip D, since you just need to know one of the cards on the top 3 of either deck. Ace Chip lets you make a Chip-based deck that uses this card heavily for extra Power regardless of effect chosen. With [card img=”https://www.v-mundi.com/wp-content/uploads/2020/11/029-Golemon.png” name=”Golemon”], the Corrupt 5 can add Trash 5 or Boost +500 Power. If you can Corrupt 5, Trash 5, and then Static 5, it’s immensely devastating.

Digimon COTD: Beam Gun

Beam Gun—Make your Power 0 to halve your opponent’s HP.

What’s good about it: Beam Gun can turn a lop-sided fight in your favor—giving you a virtual attack that is much higher in situations where you’re behind. It’s very helpful for Crash and Counter attacks since they already have 0 Power. This also has some pretty nasty combos overall. Beam Gun is even better if you can see the opponent wants to Counter, since you’ll dump your Power to 0 while still dealing some damage; so it doesn’t only work while behind.

What’s bad about it: Halving isn’t always going to be better than a normal attack, so this card requires specific timing and doesn’t usually work well when you’re already ahead. [card img=”https://www.v-mundi.com/wp-content/uploads/2016/08/067-ShiningMane.png” name=”Shining Mane”] is better in situations where halving + attacking would score.

Tips: Run Beam Gun with Crash Digimon, or high HP Digimon (which tend to have lower Power). Try to save Beam Gun for when your opponent gets up to Mega, since they can’t evolve to recover the HP this removes and can set you up for 2 KO points. Running other Beam-Gun-like effects such as [card img=”https://www.v-mundi.com/wp-content/uploads/2016/08/034-Gazimon.png” name=”Gazimon”] and Shining Mane, can really help iteratively bring down massive damage-sponges. Absolutely busted with [card img=”https://www.v-mundi.com/wp-content/uploads/2016/08/119-Knightmon.png” name=”Knightmon”]’s evobonus such that its Power can’t become 0. Speaking of Knightmon (and Stardom), it heals you +500 and opponent somewhat, but that’s cut in half if followed by Beam Gun.

This is also a weirdly excellent counter to Crash, since their HP is halved before they attack you. Beam Gun is like the evil mirror version of [card img=”https://www.v-mundi.com/wp-content/uploads/2016/08/175-Metal-Banana.png” name=”Metal Banana”], yet is an excellent counter to that bastard of a card—your power is already zero, their HP will now be quartered. This is also an incredibly punishing card if it resolves after [card img=”https://www.v-mundi.com/wp-content/uploads/2016/08/171-Mega-Disk.png” name=”Mega Disk”], since they’ll have trashed a huge amount for very little. Any “if HP is higher” effects by the opponent will almost certainly be shut off by a first-resolving Beam Gun. Beware of Chainsaw, since it hard-counters Beam Gun to the point of absurdity by making their HP 10 after. Play with [card img=”https://www.v-mundi.com/wp-content/uploads/2018/05/038-Gokumon.png” name=”Gokumon”] Activate, for a ridiculously easy KO by halving their HP then reducing it by their Cross.

Digimon COTD: Super Tag

Super Tag—an Evolution card that provides +10P and save all your other DP after you evolve.

What’s good about it: Super Tag puts itself into DP, so it doesn’t take your one rack for the turn. It’s one of the few Evolution cards that work when going to Level M. Saving your DP for later has obvious evolution benefits, as well as assisting some effects. You get to keep your DP if you later use an Evolution card that requires DP like [card img=”https://www.v-mundi.com/wp-content/uploads/2016/08/162-Warp-Digivolve.png” name=”Warp Digivolve”], since it doesn’t say “When evolving by DP,” just “When any of own DP would be trashed”.

What’s bad about it: This card does nothing for you if you don’t have other cards in DP (and progressively better the more you have)—”+10P” is helpful but gets you nowhere on its own. Since it has to be deleted, you have to plan carefully around the precious few times you can use it.

Tips: This card is amazing for decks that want to evolve quickly and keep evolving consistently. If you can usually make one evolution quickly but not two, Super Tag gives you the second. It also helps card effects like [card img=”https://www.v-mundi.com/wp-content/uploads/2016/08/090-Rusttyrannomon.png” name=”Rusttyrannomon”], [card img=”https://www.v-mundi.com/wp-content/uploads/2016/08/090-Devidramon.png” name=”Devidramon”] and [card img=”https://www.v-mundi.com/wp-content/uploads/2016/08/142-Weregarurumon.png” name=”Weregarurumon”] become really powerful—since they each rely on how much DP you have to power their various effects. It can also save [card img=”https://www.v-mundi.com/wp-content/uploads/2017/08/030-Kyuubimon.png” name=”Kyubimon”] support users a lot of trouble by allowing for evolution and still protecting the support effects you put in DP. [card img=”https://www.v-mundi.com/wp-content/uploads/2018/05/009-MetalArmor.png” name=”Metal Armor”] + Super Tag is a devastating combo that allows doubling, tripling (or more) own power and instead of trashing all that DP, you just delete the Super Tag, then evolve later anyway—consequently, this makes Metal Armors chainable: you can play one, delete the super tag (replace the tag with the top digimon of deck to maintain size via metal armor’s other effect), then play another metal armor. It protects [card img=”https://www.v-mundi.com/wp-content/uploads/2016/08/064-Togemon.png” name=”Togemon”]’s DP superiority check, so you can have Drain more often. Super Tag also protects any other card in your DP from [card img=”https://www.v-mundi.com/wp-content/uploads/2020/11/016-Catastrophe.png” name=”Catastrophe”] and similar DP-killing effects by the opponent. It also unintuitively makes the attachable TOY-34 [card img=”https://www.v-mundi.com/wp-content/uploads/2020/11/034-Missile-Pod.png” name=”Missile Pod”] and [card img=”https://www.v-mundi.com/wp-content/uploads/2018/05/065-MetalParts.png” name=”Metal Parts”] better by saving your resources from going to DP, now they can be converted to Power. Playing it with the Evolution card [card img=”https://www.v-mundi.com/wp-content/uploads/2016/08/165-Digivice.png” name=”Digivice”] will give you even more ways to keep your DP for later. Don’t bother trying to stack recycle effects to re-use this, since it gets deleted, but recycling can still help you get it in the first place, in case it gets trashed or discarded.

Digimon COTD: RedOtamamon

RedOtamamon—the only “+40P” in the game thus far.

What’s good about it: RedOtamamon gives +40P—double the average Rookie. Its effect is small but useful: looking at your opponents hand can help you chose attacks, future supports and determine whether it’s the right time to use any “Activate” abilities you have. It is also outside of support phase so good luck voiding it.

What’s bad about it: RedO’s ability shuts of your support for the turn, so it’s harder to use the info you get. His body is terrible, though if you’re actually attempting to use this in , Rookie bodies don’t matter much to you anyway.

Tips: This card is well suited for fast evolve decks; 40DP with get you to majority of Champions and Ultimates in the game. Its effect helps when you’re ahead, letting you leverage the information you gained to stay there (one turn late). Evolution cards like “Warp Digivolve” and “Hyper Digivolve” help the 40DP from RedO take you much farther.

Digimon COTD: RustTyrannomon

RustTyrannomon—A Mega with a huge potential power boost or heal.

What’s good about it: The “Activate” effect of RustTyrannomon happens when attacks are revealed—on either player’s turn. The +50% multiplier gives you a huge boost to either Power or HP, whichever is most needed at the time, which makes this a tough card to overtake.

What’s bad about it: You have to use —the easiest attack to stop in the game. RustTyrannomon’s own ability is rather dull (most of the time Counter on a Mega is worse than using your other attacks). You have to discard everything; your hand, your DP, and your attachments, which is a huge price and will cost you the game if used flippantly.

Tips: It’s best to use RustTyrannomon’s “Activate” as a threat, not a promise. Once it’s used, it’s done and your opponent just has to adapt but until then, it’s still formidable. Evolution cards like “Super Tag” and “Digivice” leave your DP alone, letting you charge Rusty like a proton cannon. Cards that allow you to easily support from the top or draw extra cards can keep your hand high without giving up supports. The card “Training Manual” is good both the turn you use his ability, and the turn after.

Always try to see if there’s a way to threaten a one-hit-kill with him first, make your opponent outplay it, then just boost your power some other way. HP gain is usually the best and safest option and can allow you to replenish your hand quickly, which can surprise an unprepared opponent. Try to see if your opponent has any cards that force discards such as “Scummon’s Curse” before committing the activation or you may find yourself using a weaker cannon and have an impossible time recovering.

Digimon COTD: Digi-Diamond

Digi-Diamond—the Swiss-army-knife of Ace cards.

What’s good about it: Digi-Diamond is currently the most versatile Ace. “Any Phase” timing extends the number of cards you can play per turn (and is extremely powerful and limited). Changing your attack in the support phase is powerful, since you can evade a counter or buff a different attack. Changing your type can help you get around “x3 VS” and aid in evolution. HP Recovery and the revive effect both help you keep your current Digimon, for evolution purposes or dealing a finishing blow (best on the opponent’s turn). Draw 2 is icing on the cake that make this one of the more powerful cards and the Ace you can’t go wrong with.

What’s bad about it: The power gain, like every other effect of Digi-Diamond is small. Each Individual effect has specific uses, and most of them don’t really assist each other—you’re usually going to play this for one of its effects at a time and just get the others as nice bonuses.

Tips: Digi-Diamond is a good starting point for the deck’s Ace if you’re not sure what it needs. Playing Recycle effects lets this card shine, allowing you to use it for whichever effect is the most helpful now and then recycle it back for later. If you find yourself using Digi-Diamond for the Draw 2 most of the time, use a different Ace. Other Aces do much more than just draw—yours will get outpaced by them.

Digimon COTD: Witchmon

Witchmon is a  Champion that Boosts Power and can evolve to types.

What’s good about it: It fits with  typical  x3 VS while adding some other coverage for , which is the best type for taking out Nightmare digimon in one hit.  x3 VS almost always evens the playing field when they inevitably end up at a higher level than you. +30P is higher than average, helping speed up evolution. Evolving to  type lets you play [card img=”https://www.v-mundi.com/wp-content/uploads/2016/08/134-Angewomon.png” name=”Angewomon”] for [card img=”https://www.v-mundi.com/wp-content/uploads/2016/08/092-Mastemon.png” name=”Mastemon”] decks, and other / crossover decks without any downside of being threatened by an extra x3 VS. Even the small HP +50 is good for covering some of Nightmare’s excessively weak HP. The uncounterable evo-bonus is a godsend for protecting her modest circle.

What’s bad about it: It’s not fully , so it can’t evolve from . Witchmon’s support reduces both and to 0, making top-deck supporting risky.

Tips: This card is a tactical choice for your Destiny Zone If your partner is BKGatomon, despite its overall low stats. Witchmon’s support ability plays well with Cross abilities like “x3 VS” (which she has), “1st Attack” and “Drain”. Since the power boost happens before the x3 VS, it can easily generate a KO, and Nightmare decks typically change the opponent’s type to Engima so they leave nothing to chance here. Nightmare almost never has 1st Attack, but Wind has a lot; so pairing +400 with 1st Attack is stronger than the option-level support Behemoth by magnitudes, and easily generates KOs. Drain is just exhausting to fight if it gets such a power boost.

Digimon COTD: Concert Crash

Concert Crash makes your power the same as your HP then halves your HP.

What’s good about it: It gives you Crash without your Health being reduced to 10. Unlike Crash, if your HP changes, your power will not. Since it affects all Power, not just cross like crash, this can be used with other cross abilities such as x3 VS, Jamming, 1st Attack, and Drain. In particular, 1st Attack is a devastating auto-kill from any situation. If you can hit the opponent with a big attack, then use 1st Attack + Concert Crash the next turn, it’s like your Power was the combined total of the two. With Drain, it’s absolutely busted since there’s no actual cost once you hit. A x3VS with your HP as power is overkill to the maximum. Jamming with such high Power is incredibly strong, since it makes you effectively uncounterable so you won’t hit yourself with your own HP, can’t be 1st Attacked if you’re abusing the “halve HP” cost while at low HP, and any Digimon support that would interfere with such a huge gambit is dead. Another ridiculous attack ability pairing is Grudge + Concert Crash. Assuming your opponent plays right into the Grudge and KOs you, you will revive for double the HP you started with, not your halved HP or original HP! If you don’t get KO’d, it’s even better since that means you get double your HP as power. Concert is also a proxy, which makes it a great choice for decks with [card img=”https://www.v-mundi.com/wp-content/uploads/2016/08/183-Partner-Finder.png” name=”Partner Finder”] or for partners that have some form of HP protection as their main support, to cover all bases.

What’s bad about it: The HP reduction happens before any attack, making it harder to use on your opponents turn. The card is not just bad to use when your HP is low, it’s even more dangerous than Crash (because your HP is lowered before attacks). Awful card if your used attack has Counter or Crash.

Tips: It is best to play this when you can get a KO—high health Digimon make this far more likely, while Digimon with 1st Attack make it easier to use on your opponents turn. Decks that are specialized for Crash can use this to survive Crash attacks they otherwise wouldn’t. If you have [card img=”https://www.v-mundi.com/wp-content/uploads/2018/05/019-Olegmon.png” name=”Olegmon”] Level M, you can pay -300 HP instead of half and it’s unvoidable, making this a bomb you can detonate with no blowback. If this is played after [card img=”https://www.v-mundi.com/wp-content/uploads/2016/08/164-Level-Crush.png” name=”Level Crush”], it’s almost guaranteed to KO any opponent instantly and “halving” your HP in that instance just means going back to normal. [card img=”https://www.v-mundi.com/wp-content/uploads/2017/08/018-ZeedMillenniummon.png” name=”Zeedmillenniumon”] has the highest printed HP in the game of 3000 and can search this card, making it a guaranteed KO in every normal situation, and can be used with its Jamming or Corrupt. If the other searched card is also massive HP recovery, Zeed can bounce back from the cost.

A vanilla but devastating Level M for this card is [card img=”https://www.v-mundi.com/wp-content/uploads/2016/08/161-Saberleormon.png” name=”Saberleomon”]—it has 1st Attack for use with Concert Crash but then an Activate that makes the opponent’s Power 0 for the same cost of halving HP. At that point, it’s just entirely dodging the cost, since it can pummel with 770 more Power. With 1950 HP, a good case scenario is 1950 damage 1st Attack for KO, then get unopposed victory bonus, then a riskless 770 Power attack when the opponent fields a new Digimon, followed by 770 again on your own turn for a very likely 2KOs. [card img=”https://www.v-mundi.com/wp-content/uploads/2016/08/026-SnowGoblimon.png” name=”Snowgoblimon”] has the highest Level R HP: 780. This is a highly solid attack, made marginally better by its Shatter 100 which will still reduce incoming damage by 100 (and trash an attach), making the halved HP of 390 more like 490 for the consideration of an opponent striking back.

[card img=”https://www.v-mundi.com/wp-content/uploads/2016/08/093-Whamon.png” name=”Whamon”] has the highest Level C HP: 1300. With its considerably strong added support of Jamming, Whamon can smash most Level Us and anything below for a KO, while ensuring no interference from Digimon supports or cross abilities. Its remaining HP of 650 isn’t as bad as Crash, since it’s not a guaranteed KO-trade. Therefore, Concert Crash is well-paired with Evolution cards such as [card img=”https://www.v-mundi.com/wp-content/uploads/2016/08/167-Mutate.png” name=”Mutate”], since you can simply reset your HP after an attack on the opponent’s turn (Concert can do well there if it doesn’t kill you).

Digimon COTD: Mutate

Mutate allows you to evolve to the same level and heal.

What’s good about it: This card allows you to refresh HP, evolve from the Abnormal state, and removes Type restrictions when evolving. You can quickly evolve to a Champion or Ultimate by playing one as abnormal, then “Mutating” into the same level. It even treats Level M as U for the purposes of “same-level” evolution, just like in the PS1 game. You still get an evo-bonus, which means you can play abnormal, Mutate to another of the same level, and get an evo-bonus.

What’s bad about it: Mutate requires DP, gives no discounts outside of evo-bonuses, and you can’t (really) change level with it.

Tips: It is absolutely great for stalling strategies, letting you refresh your Active Digimon. This card allows you to run a higher number of C/U Digimon—especially when paired with other Evolve cards like [card img=”https://www.v-mundi.com/wp-content/uploads/2016/08/164-Level-Crush.png” name=”Level Crush”] and [card img=”https://www.v-mundi.com/wp-content/uploads/2016/08/166-D-Link.png” name=”D-link”]. It’s not as good as Level Crush for the pure purposes of saving the Level M from giving up 2KOs, not as good as D-Link for pure abnormal evolution due to no DP discount. But D-Link can’t be used with Level M since they can’t go “up” anymore, and Level Crush can’t be used to reset yourself to a Digimon of the same power level as well as Mutate. It blends the two cards purposes together and provides an extremely fast and stable reset for the active. Mutate also acts as a supplement for the other two cards if they’re part of a primary strategy. Since you can only have 2 copies of any Evolution card, a deck with heavy D-Link focus to quickly evolve to Level U is more effective if it can make use of Level U hand flooding that might occur—a job which Mutate does. It’s also good in any deck where you might get flooded with the same Level. Shogungekomon‘s Level C search pushes those decks to play more Level C, which Mutate can stop from being a weakness. A last-minute Mutate to a Digimon with the appropriate x3VS ability can turn the tables significantly. In that situation, you can evolve at a normal pace to not give up your power, then Mutate later to fix the current digimon with one you prefer. In that way, it also acts as a small DNA fixer and a way to get an evo-bonus when you otherwise couldn’t (both for same-level evolution and for changing the current active’s name for a later evolution). Since Digimon of Level U are very powerful, Mutate works extra well on these and you’re not limited by their Ruler property.

Digimon COTD: ShogunGekomon

ShogunGekomon, Is an Ultimate level Digimon with an exceptional body and a support that searches for a Champion.

What’s good about it: Shogungekomon’s deadliest attack is , which makes it a difficult opponent to shut down. If it becomes outmatched, it can use drain to stall for long enough to evolve. Most Digimon with drain don’t have HP this high, at this level for this cost. A [card img=”https://www.v-mundi.com/wp-content/uploads/2016/08/154-Lilithmon.png” name=”Lilithmon”] Level M could outpace its stalling capability with higher starting HP and higher drain, but at Level U, Shogungekomon is only outmatched by higher-cost Digimon such as [card img=”https://www.v-mundi.com/wp-content/uploads/2016/08/125-Neodevimon.png” name=”Neodevimon”]. The biggest contender for a match is [card img=”https://www.v-mundi.com/wp-content/uploads/2016/08/121-Blossomon.png” name=”Blossomon”], which has higher Drain but lower starting HP. Essentially, Shogungekomon bets on its high triangle Power to be safe enough that it won’t need to stall as often as Blossomon when threatened, but can stall if 700 Power falls behind the curve. Generally, any Digimon with a high is tough to beat since you can’t rely on as many tricks to stop their attacks. The Support effect can search Champions for various purposes such as: Rack as DP, support with various conditional effects based on the current situation, obtain DNA materials, or in the worst case to pick out the next body if your active is at risk of KO. The best part is you don’t have to wait to support with that Level C if you can pay the trash. The trash cost also feeds into its evo-bonus if you later evolve to it. The evo-bonus adds to its conservation nature by retrieving something in trash, which could be anything best-fit to the situation.

What’s bad about itHaving Drain is a two-edged sword most of the time; it usually means your printed HP is going to be a lot lower than comparably-costed Digimon. Shogungekomon is no exception here—1400 HP puts him right about where a 40 cost Ultimate with Drain can be and no higher. This means most other Ultimates of the same cost are going to steamroll him if he doesn’t commit to Drain in order to hang on until an appropriate support comes along to assist. Additionally, the Champion you search is one your opponent now knows about, so it could be played around if they support second and you choose poorly or get stuck in a bad spot.

Tips: When using it as a body and you can get the evo-bonus, a good set of cards to keep in the deck are ones that pay trash costs for powerful effects, since that creates more opportunity to check the trash. Keep an eye out for “Also counts as  type” in other printed frame colors like Monochromon. Make sure you load up your deck with a few reliable Champions that are hard to punish, such as Drimogemon, Galgomon, or Garurumon.The support heavily benefits from Nature’s commonly overlooked conditional cards such as [card img=”https://www.v-mundi.com/wp-content/uploads/2016/08/106-Icemon.png” name=”Icemon”], Ankylomon, Tailmon, and Leomon. Since you can just pick whichever fits the situation, it makes sense to structure a deck’s Level C lineup with few copies of each, but more variety. This can make the deck overall less reliable for DNA…except Shogungekomon also allows searching for the purposes of DNA. Make sure you set up a clear path for evolving to Shogungekomon—it usually requires an Evolution card unless you have a body like Garurumon or Icemon which can tank for long enough to rack. Don’t get caught in a Drain-lock for too long, where you can’t afford to play anything but Drain and nothing is fixing it—take a few mulligans to get out of it and start coming back, especially if you have cards that “activate an evo-bonus” since the mulligans won’t punish you in that case. Have a Level M handy that you can evolve to when Shogun inevitably gets outmatched—[card img=”https://www.v-mundi.com/wp-content/uploads/2016/08/001-MetalEtemon.png” name=”Metaletemon”] is good for this since it has a DNA with Meteormon (whose support condition is trivial to meet for you), and has a crazy-strong body with high HP, solid power distribution, and another searching effect as an Activate.

Digimon COTD: Level Crush

Level Crush! An evolution card that lets you evolve downward and double your HP.

What’s good about it: It more than refreshes your HP with very little card investment, keeping you going on the same active far longer than usual. It also lets you use your Mega and then evolve when you get low—forever denying the 2 KO points that Megas provide.

What’s bad about it: This card is practically useless when you’re losing, or stuck on Champion. Using it while behind in points could propel you even further behind if the opponent has a solid evolution strategy. The fact that it takes your evolve for the turn can really slow down your game.

Tips: Level crush is best used when you’re running Champions with a lot of health. It is best to avoid using it until you’re low on HP or are above Champion. Having Champions with good abilities like Jamming and Shatter can send the game spiraling into a never ending slog for your opponent. Mix with the card “Mutate” for best results.

Digimon COTD: Chainsaw

Chainsaw. An Option played in the Support phase that triples your power. Then after the battle, if you’re still alive, you go straight to 10 HP.

What’s good about it: What’s great about this Option is how it really helps come back from an absolute pummeling. Especially if used on the opponent’s turn, so you go into your own turn ready to evolve and heal yourself back up.

What’s bad about it: It’s essentially useless with a Drain ability since the 10 HP occurs at the end phase, and doesn’t work at all with Crash or Counter, but few things do. Meaning Chainsaw is for playing it straight: using , or an attacky-.

Tips: You can get massive numbers if paired with a that has “x3 VS”, which will sextuple them. If used like this versus a Mega level, you can earn 2KOs for the one you will inevitably lose. Securing a dominant position with Chainsaw can only be done if it’s your opponent’s turn when you play it and you can evolve next turn. Otherwise, you’re just setting yourself up so they can knock you down.